Tuesday, November 30, 2010

Singing in the Rain

First, a health update for Kyle. My cranky toddler 20 year old is MUCH better and has several asthma fighting drugs on board. Also discovered that he has an ear infection. Fun.

Now for the real fun! The rain coat is finished and I love 90% of this Amy Butler Rainy Days raincoat pattern. Everything except the sleeves which are apparently drafted for stick people. Laura is thin, and the sleeves are too snug for her. I made the medium which is actually bigger than her measurements. She's between a small and a medium, so I went up, thinking she would get enough ease to wear actual clothes under her coat. No. So, I've brought it home to rip out the hems on the sleeve and bottom and hopefully there's enough seam allowance to get a little extra room. I'm strongly considering adding a gusset to the underarm area for a bit extra room as well. But don't you want to see it? How about a video?


And some stills:


And by the way, for readers of my blog, if you use the coupon code SEWINGBLOG15 you will get 15% off either of my shops, Jenna Belle Designs or Down the Street Creations.

Monday, November 29, 2010

Thanksgiving Road Trip

I understand for security reasons, many bloggers don't want to let the world know when they're traveling, and I was feeling the same. So, this past week, I was actually not in Georgia, but had flown north to Virginia Beach with husband, son, daughter and son-in-law to celebrate the holiday with Roland's brother and his family.

We tend to be homebodies on Thanksgiving, but this young man,
our nephew, Aaron, is heading to Afghanistan next week. He joined the Marines 2-1/2 years ago, and has already been to Iraq, but this time seems far more dangerous. He wanted everyone that could, to come join the family for Thanksgiving, and a bonus early Christmas celebration, and we were happy to do just that.

We made our flight plans back in early October, way before the current TSA hoopla. I'm happy to report that no one in our group experienced the full body scanners, or the dreaded pat down. In fact, I think we made it through security in Atlanta in record time.

All went great in Virginia Beach, and we consumed massive amounts of turkey, pie, cookies, cinnamon rolls, and real Italian meatballs and spaghetti sauce. Unfortunately, Kyle had a cold which got progressively worse, and last night, after landing in Atlanta, and fighting the traffic at the airport, we found ourselves staring at this:

Yes. That's the kind of thing you see in a hospital. In an ER. Kyle had been having trouble breathing the entire weekend, and we had even visited Urgent Care in Virginia Beach, but as in the past, he got worse instead of better. We finally left about 2:30 in the morning, and we headed straight to the 24 hour McDonalds for cheeseburgers. Yum?

Well, they were yum! And today was all about catching up with mundane household-y kinds of things. Happily we have food in the house now! Tomorrow we might even have clean clothes!

Friday, November 26, 2010

Another Giveaway!

... And it still isn't mine! This one is from my friend, Denise, the Queen of the Blue Gardenia. Head on over to her blog, The Blue Gardenia. You will not be disappointed!

In raincoat news... it fits. Sort of. The sleeves are a little tight for her, so I'm going to take it home and attempt to remedy that. She can wear it as is, but fits best just over a tank top which sort of defeats the purpose of making it a cold weather raincoat. Pictures soon, as you just won't believe how cute it is. And if you want some of your own super duper raincoat fabric, it's on sale until Sunday night at Gorgeous Fabrics, and comes in chocolate brown, black and navy. (I've already bought more black for me, so go ahead and shop!)

I hope you all had a marvelous Thanksgiving (if you celebrate), and are working your way through your leftovers now!

Monday, November 22, 2010

Raincoat Update

I've been sewing like mad, trying to finish this raincoat by tomorrow. It was going great, until I got to the sleeves, but more on that in a minute. First, a little about the topstitching. Topstitching is obviously pretty much straightforward, but one thing I do to keep the bobbin thread from showing is this:
Thread that little "finger" on your bobbin case, if you have one, and it adjusts the tension on the bobbin thread without messing with the little screw on the case.

So. I was all set to brag about how marvelous this pattern is (and I still think it's marvelous.... but) until I got to the sleeves. Thank goodness for Gertie's Lady Grey Sew Along! I used this post as a stepping stone, and modified it to work with this kind of coat/fabric.

I used a 100% cotton bias strip because I didn't need any bulk for the sleevehead. (Oh, first I skipped the gathering stitches called for in the pattern instructions. Well, not quite true. I stitched them, and then when pinning in the sleeve noticed some BIG problems.) Like Gertie says, pull on the bias strip, and push on the fashion fabric. But not too much. The goal is to utilize the bias strip like a gentle elastic, allowing it to do all the gathering work. You're trying to avoid puckers.

This worked pretty well with the lining fabric. It worked OK with the raincoat fabric, but let me tell you... I love this fabric! It repels water like nobody's business. But. There is absolutely no stretch at all, which means you just can't make it do what you want it to. I'm afraid the sleeve is not set in that perfectly. I'm hoping once the lining is in, the bulk of it all will make any imperfections in the sleeves less noticeable.


A couple more peeks:
The picture isn't that fantastic, but I wanted the harsh light so you can see the details in the black fabric.

The back view with the hood, and some of the topstitching detail.

Now, everyone keep their fingers crossed that it fits! Of course, I should have/could have made a muslin, but I wanted to give her the finished coat this holiday. With her living 3-1/2 hours away, that makes it a little more difficult when there's a time crunch. I'm feeling optimistic!

Sunday, November 21, 2010

It's Giveaway Time!

Oops, fooled ya! Not mine. At least not yet... 7 more followers to go. But Victoria of 10,000 Hours of Sewing is having a giveaway to celebrate her one year Blogiversary. Actually, she's having SEVEN giveaways, so it will definitely be worth your while to check them out! They start tomorrow.

Saturday, November 20, 2010

Another Coat?

It's true! My next current project is another coat, but this one is proving to be pretty easy. I'm making Amy Butler's Rainy Day coat, and I'm making it for Laura. She's young, she's hip, she's trendy conservative. I thought she might opt for a funky laminate print, but no. She chose black. A high end, raincoating fabric from Gorgeous Fabrics, but black.

She's applying to graduate schools, and everywhere she's applying is in a much colder climate than she currently lives in, so I decided to add some warmth to this raincoat by quilting the body lining with this:
I've done a bit of machine quilting in the past, and this really isn't difficult. There are a couple of ways to go about it. The easiest way is to simply pre-quilt your fabric before you cut it out, but where is the fun in that? No, I cut out my lining pieces, and then proceeded to quilt them.

Some tips. You want to have your batting a bit larger than your pattern piece because it tends to draw up just a bit as you quilt. I'm only using batting and the lining without a third layer, as the edge of the lining is folded into the hem. Then there are the darts, front and back. I didn't want the extra bulk from stitching the darts in the batting, so I just cut them out and "sutured" them together. Like this:

This keeps the 3 dimensionality effect caused by the darts, but eliminates any bulk. Then I marked my quilting lines, and "basted" the pieces together with quilter's safety pins. These little pins are purposely bent to make them easy to use. To mark the fabric, I used a 24" long quilter's ruler, and marked diagonal lines every 2" using a chalk pen. I'm not sure the exact name, but it's like a little pen, with a chalk compartment and a little wheel on the bottom where the chalk comes out.

Are you just dying to see the lining fabric? Here it is, a Joel Dewberry home dec fabric from fabric.com that is a wonderful weight 100% cotton.
Make sure you mark before you pin, or it can be a real nuisance. Because this is lining, and will only be seen in limited amounts, I didn't obsess over the distortion caused from the darts, or the mistakes that I made. Especially the line that was marked 3" apart. Egads! Doing the machine quilting can become kind of zen like as I just made my way over the fabric, stopping just into the seam allowance (which was marked). I want to be able to trim away the batting easily in the SA.

Another cool tool I used was some quilter's gloves that have rubberized tips that help you guide your fabric. It's amazing how slick cotton can feel as you try to manuver it. (Ignore the dirty fingertips, please.) I think rubber gloves might work just as well. And almost forgot to mention, but if you have one, a walking foot makes this job so easy, and really does minimize the drawing up and "crawling" that one fabric can do over another one.


Tomorrow I plan to cut out the outside raincoating fabric, and could possibly have it finished by Monday or Tuesday! I'll be seeing her over the Thanksgiving holiday, so it would be great to deliver it in person.
Thursday, November 18, 2010

New Hair

Thanks for all the coat compliments! I love getting comments, and y'all in the sewing blogosphere are so sweet and supportive! I'm planning a giveaway when I hit 100 followers, so if you're just a lurker, hit that follower button and join the fun.

Anyway... I've been contemplating a new 'do for several weeks now, and after seeing the back of my hair in those coat pictures, what with the 3" long dark roots and all, well, today was the day. Plus my hairdresser had an opening when I called this morning. So, off with it!

And, it only seems fitting what with the Royal engagement announcement and all, that its kind of Princess Diana-ish.

Wednesday, November 17, 2010

Lady Grey is So Finished!

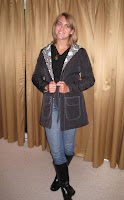
Do I look happy? Well, I am! On Sunday, I was actually kind of hating this coat. Sewing fatigue, maybe? But I did something really simple, and it totally changed the look and the way I felt about it. What is it you ask? I simply topstitched around the entire front edge, lapels and collar. That's it. You see, I hadn't done any topstitching, but this left the front edge and lapels weirdly poofy and no amount of ironing was going to tame them. I had even understitched the facing up to the lapels and around the neckline. But, no. Anyway, it's done and I've blogged a lot about alterations and muslins and the process, so today, just a few observations and some more pictures.

Gratuitous gorgeous sunny fall day picture. Too sunny really to get good pictures.

 I'm happy with the fit for the most part. And enjoyed the tailoring process.

There is still that wrinkle across the back, in spite of the sway back adjustment. Oh well. I'll live.

Hard to see in the picture, but each belt loop has four lines of topstitching. The first two were kind of uneven and I was too lazy to make new ones, so I added 2 more lines of stitching and I kind of like the effect.

I added those really big snaps instead of buttons and I love them! With the giant belt loops on the back, I'll always wear the belt, so the button would be hidden anyway. I'll save the 3 I bought for another project.

The biggest flaws in the sewing are on the inside and it's pretty much a hot mess. Puckery princess seams, wonky hem, sleeve lining was too short,and I just added another band of lining.

And the lining is Hot! It's Pink! It says "Look at ME!" Oh well, again, I'll live. Most of the time, curious onlookers will only see a glimpse anyway.

And that's it! Curious about more of these posts?
Muslin #1
Muslin #2A
Muslin #2B
Cutting it out
Pad Stitching
The Interfacing

And I think that's it. How about some more pictures!


Saturday, November 13, 2010

My Mondo Top -- Vogue 8151

If you watched Project Runway this past season, then you must remember the Jackie Kennedy challenge, and Mondo's tee and skirt outfit that won.


From the moment I saw it, I knew I wanted my very own Mondo top! How do you feel about knock-offs? I feel like, it's ok, if you're making it for your own use. It's not like I'm going to make lots of them and sell them. I also feel like home sewistas are often inspired by designers and RTW fashions. How many times have you seen something in a store, and said "I can make that"?!

Anyway, I already had Vogue 8151, and with just a couple of modifications, I had made myself a Mondo top.
I used a Michael Miller cotton interlock knit from fabric.com which is super soft, with a nice, beefy weight. These knits shrink quite a bit, so be sure to prewash if you purchase any. The sleeve on this pattern is already 3/4 length, so I just determined where I wanted to cut it, and added seam allowance to the cut. I did shorten the length by an inch.

I also made the neckline more of a boatneck, though it could have be made even more so, and I didn't use the neckband in the pattern. I simply serged the neck edge, and folded it over 5/8". I was worried about matching the stripes just a bit with the dart, but didn't have any problems.

I'm not the only one who wanted a top like this! Laura wanted one, too, and I made her one in black and white. I lengthened the body an inch for her and left the sleeve length alone. I also made her one size smaller (the "B" size). I haven't sent it to her yet, so fingers crossed that it fits.


Thursday, November 11, 2010

A New Baby


My Etsy friend, Holly Anne, had a beautiful baby boy yesterday, so in honor of her and Cohen, I want to share this fun video. And to my own children, when you have your own babies, this could very well be what I want to do with them.

Wednesday, November 10, 2010

Something Different

You know that I have Etsy shops, and sometimes I actually do some work on them. Usually it's purses, clutches and the odd quilt now and then, but a couple of months ago, Roland actually did a little marketing for me, and pointed one of his colleagues in my direction. She's Jewish, and apparently when Jewish children reach a certain age they receive a prayer book. Traditionally, covering this prayer book would be an elaborate cover handmade by the mother or grandmother.

Well, this mom is a corporate attorney, and is, well, by her own admission, not crafty at all. This is where I come in. Her son didn't want anything traditional, and I think you'll all agree, there really is nothing Jewish about this book cover at all.


Roland found the hockey fabric at G Street Fabrics in Rockville, Maryland on our trip there this past September.

A clarification about my yarn ball for Karin: I didn't spin this yarn, I merely wound it into that marvelous ball. I'm probably at least a few years from actually spinning yarn, if ever, but thanks for thinking that I'm that clever. It made me smile!

A parting shot:

Saturday, November 6, 2010

Ta Da!!

OK, admit it. That last post was just so boring informative, you could hardly stand it! And by the title, you're thinking... She has finally finished that darn Lady Grey coat, and we can move on from those boring informative posts and read about something else.

But you would be wrong.

I've done this! Made a ball of yarn from a hank of yarn. Oh no, you're thinking that now she's gone and done something really boring  exciting now! Yet it seems I have become instantly addicted to an age old pasttime that I previously thought I had absolutely no interest in. So I bought a knitting book (more on that later), ordered some yarn from fabric.com (where else?), and the sticks have been clicking! (Well, you had some foreshadowing of this event with that scarf I showed you, right?) Look how pretty:


Yes, I know that's the back side (the purl side for you yarn enthusiasts... see, I know what I'm talking about). I just love the way it looks.

Oh. And I FINALLY finished the pad stitching on my Lady Grey collar. Could it have taken ANY longer?

Wednesday, November 3, 2010

Interfacing for the Lady Grey

I have used 4 different kinds of interfacing for the Lady Grey, plus sleeve heads. And what are they? Well, 2 kinds of hair canvas. The one on the side piece is just regular hair canvas that I bought at G Street Fabrics in Maryland. Unfortunately, it was only half as wide as I thought it would be, and I didn't have enough. So for the front piece, I ordered what turned out to be Pro-Tailor Fusible Hair Canvas from Fashion Sewing Supply.
Well, I knew I was ordering the hair canvas, but the fusible part turned out to be the surprise part.

Never mind though, instructions came with the fusible hair canvas, and I just went with it. As you can see, the lower sleeve part has yet another interfacing, and this one is Pellon 860F Ultra-weft. Also fusible. Seems pretty good, and is loosely woven.

Do you see the cute pink polka dot pocket? Polyester charmeuse. The back stay is the regular hair canvas. And I'm not sure it shows up, but the back hem is interfaced with pro-sheer elegance fusible interfacing, which is a very lightweight knit interfacing. Seemed like a good idea. I'll let you know when I get to the hemming part.

And I used a sleeve head to support the sleeve cap and to help with the easing. The sleeves went in pretty easily with only one pucker that I had to fix.

And then on to the pad stitching for the collar. I had enough regular hair canvas, so used that. One of the problems I had with the collar was that as you stitch, the canvas can get pulled and bunched, and then doesn't go to the edges like it should. If you hold it with pins (which I did) you get repeatedly stuck. Ouch! My solution:

Tuesday, November 2, 2010

Don't Mess with Lady Grey!

Seriously! [editor's note: that is NOT Lady Grey in the picture, but clearly must be her protector!]

[Saturday, Kyle, Roland and I went skeet shooting. Beautiful fall weather, fun company and well, not much success on my part of hitting those orange flying saucer-like "skeets".  Never mind that, what about the sewing?!!]

It almost looks like a coat!


Sleeves will be added tomorrow! And the lining is all cut out. Looking back at Gertie's tutorials (click on the sidebar sew along icon to see them), there will be more pad stitching with the collar before the lining is tackled though. Check out a close up of the pad stitching on the lapel:


I've got lots more projects lined up to start right after the coat is finished (and maybe worked in even before it's finished). Some of them will be Christmas gifts, so they won't be revealed until later.

LinkWithin

Related Posts with Thumbnails