Wilma makes a Hot Chicken Salad
This particular dish is a bit confusing to me. Is it a salad? Is it a casserole? What's the difference? I'll give you the details, and you can decide.
2 cups of cooked, shredded chicken I roasted 2 bone-in chicken breasts.
3 hard-boiled eggs, chopped
1 can cream of chicken soup
1 cup of chopped celery
2 t minced onions I used more
1/2 cup chopped or slivered almonds I used a pre-slivered package that claimed to have about 1/3 cup
1 t lemon juice
1 cup crushed potato chips
3/4 cup Hellmann's mayonnaise
salt and pepper to taste
Mix all ingredients together (except potato chips) and top with crushed potato chips. Bake at 350 deg. F for 45-60 minutes.
Serves 4-6
So, there it is in the picture with a crescent roll and a jello salad that Wilma will be sharing with you next week. The general consensus of the family is casserole, and the whole thing looks a lot like a "ladies who lunch" menu. Not my favorite, but not bad either.
In other news, I've asked my mom for some more pictures of Wilma, preferably pre-1960. She's a little confused about the whole blog thing in the first place, but we'll see what she comes up with.
Thread runs through my life, holding it together. What keeps yours from falling apart?
Thursday, December 8, 2011
Wednesday, December 7, 2011
Wilma on Wednesday Made a Shirt
... or is it a jacket? A shirt/jacket? I actually have a recipe ready so I'll post it tomorrow, but tonight I wanted to show you "the shirt". Vogue 1246. I'll even do a proper review.
Pattern Description: Very loose fitting shirt.
Pattern Sizing: 8-14. I made an 8 at the top, and a 10 along the sides.
Did it look like the photo/drawing on the pattern envelope once you were done sewing with it?Mostly.
Were the instructions easy to follow?Yes, for the most part, with some exceptions.
What did you particularly like or dislike about the pattern?I love the artsy look. And I liked that the basic construction of the shirt is easy. I disliked how the instructions made some easy parts way harder than they needed to be. Basically, the mitering of corners is not that hard, but you wouldn't know that from the instructions. And the buttons on the sleeves. The instructions are unclear, the markings are in the wrong place on the tissue, and the picture doesn't match any of the words. After making 2 of the worst buttonholes I've ever made, probably in my history of sewing, I glanced at the line drawing on the back, and got the idea of how they were supposed to work. Well, it was too late. Mine look like the picture on the front.
Speaking of buttons... the large center button was in an ancient tin of buttons that originally belonged to my grandmother, and was what I designed the shirt around. For the sleeves, I ordered buttons from an extremely helpful Etsy seller, Sunny Buttons.
Fabric Used:An Italian iridescent cotton from Gorgeous Fabrics. This fabric is amazing to sew. And I interfaced the collar and facings which is not called for in the instructions.
Pattern alterations or any design changes you made:This pattern runs huge! I am normally a 14+. But I'm short, and I was worried that I would be swamped, so after reading reviews, and the measurements on the tissue, I did a tissue fitting, and ended up cutting an 8 at the top and sleeves, and a 10 along the sides. And I shortened the sleeves an inch, and the shirt 1-3/4".
Would you sew it again? Would you recommend it to others?I will probably not make it again because it's kind of a one of a kind kind of shirt.
Conclusion: It looks best with skinny pants. Like my clovers.
On the cutting table... a denim pair of clovers.
Pattern Description: Very loose fitting shirt.
Pattern Sizing: 8-14. I made an 8 at the top, and a 10 along the sides.
Did it look like the photo/drawing on the pattern envelope once you were done sewing with it?Mostly.
Were the instructions easy to follow?Yes, for the most part, with some exceptions.
What did you particularly like or dislike about the pattern?I love the artsy look. And I liked that the basic construction of the shirt is easy. I disliked how the instructions made some easy parts way harder than they needed to be. Basically, the mitering of corners is not that hard, but you wouldn't know that from the instructions. And the buttons on the sleeves. The instructions are unclear, the markings are in the wrong place on the tissue, and the picture doesn't match any of the words. After making 2 of the worst buttonholes I've ever made, probably in my history of sewing, I glanced at the line drawing on the back, and got the idea of how they were supposed to work. Well, it was too late. Mine look like the picture on the front.
Speaking of buttons... the large center button was in an ancient tin of buttons that originally belonged to my grandmother, and was what I designed the shirt around. For the sleeves, I ordered buttons from an extremely helpful Etsy seller, Sunny Buttons.
Fabric Used:An Italian iridescent cotton from Gorgeous Fabrics. This fabric is amazing to sew. And I interfaced the collar and facings which is not called for in the instructions.
Pattern alterations or any design changes you made:This pattern runs huge! I am normally a 14+. But I'm short, and I was worried that I would be swamped, so after reading reviews, and the measurements on the tissue, I did a tissue fitting, and ended up cutting an 8 at the top and sleeves, and a 10 along the sides. And I shortened the sleeves an inch, and the shirt 1-3/4".
Would you sew it again? Would you recommend it to others?I will probably not make it again because it's kind of a one of a kind kind of shirt.
Conclusion: It looks best with skinny pants. Like my clovers.
On the cutting table... a denim pair of clovers.
Labels:
Vogue
Monday, December 5, 2011
Bought Some Fabric
I was really hoping to reveal Vogue 1246 today, but alas, the buttons I ordered last week have not arrived. Keep your fingers crossed for tomorrow. That should also give me time to figure out how to make a 2" buttonhole. Confession... I've always had some kind of buttonhole attachment thingy. But how hard can it be? 2 rows of narrow satin stitch zig zagging with some bar tacks on each end.
So, no finished top to show you. How about the fabric I bought at an estate sale last Friday?
The red is a lightweight cotton-ish fabric, about a yard or so, maybe a little more. The plaid, just about a yard, but it's wide. I'm thinking pencil skirt for me or Laura. Gray #1 is lots of tricot that will be good for linings or a slip or nightgown or 2. There's is a lot of the gray wool on the bottom, too. Destined to be a circle skirt or a cape. Grand total... $3 for all 4.
Then I had a Groupon burning a hole in my purse (well, it expired at the end of December) for Intown Quilters. $20 for $40 worth of merchandise. So I got all these:
Um, yes. I had to pull out the credit card anyway. So, starting with the green in the upper left corner... that's a cotton/silk blend, Michael Miller I think. Next an Anna Maria Horner voile, then a Michael Miller knit. The bottom row is the Colette beignet (am I the only one who hasn't made it), a Liberty style lawn, and a fine wale cord which I'm going to use for the beignet.
Definitely some fun fabrics added to my stash!
So, no finished top to show you. How about the fabric I bought at an estate sale last Friday?
The red is a lightweight cotton-ish fabric, about a yard or so, maybe a little more. The plaid, just about a yard, but it's wide. I'm thinking pencil skirt for me or Laura. Gray #1 is lots of tricot that will be good for linings or a slip or nightgown or 2. There's is a lot of the gray wool on the bottom, too. Destined to be a circle skirt or a cape. Grand total... $3 for all 4.
Then I had a Groupon burning a hole in my purse (well, it expired at the end of December) for Intown Quilters. $20 for $40 worth of merchandise. So I got all these:
Um, yes. I had to pull out the credit card anyway. So, starting with the green in the upper left corner... that's a cotton/silk blend, Michael Miller I think. Next an Anna Maria Horner voile, then a Michael Miller knit. The bottom row is the Colette beignet (am I the only one who hasn't made it), a Liberty style lawn, and a fine wale cord which I'm going to use for the beignet.
Definitely some fun fabrics added to my stash!
Labels:
fabric
Wednesday, November 30, 2011
Wilma on Wednesday: Chicken Tortilla Rolls
I hope you all had a wonderful Thanksgiving holiday, if you're reading here in the U.S. If not, I do hope you had a lovely day last Thursday while we were all dining on turkey, watching football, and giving thanks (not necessarily in that order).
We celebrated a small feast at a restaurant on Thursday, and then Laura, Thomas and Thomas' dad came down from Tennessee, and we had more fun Saturday and Sunday.
Saturday was definitely all about the college football for us...
The University of Georgia played their rivals Georgia Tech (and won!!), and with a kickoff at noon, we needed a basement friendly menu, so chili, guacamole, chips and chicken tortilla rollups made the cut. I don't really know the origin of the rollup recipe, but it's in Wilma's cookbook, and true to form, it's a little vague... I've listed in red what I actually used or did.
We celebrated a small feast at a restaurant on Thursday, and then Laura, Thomas and Thomas' dad came down from Tennessee, and we had more fun Saturday and Sunday.
Saturday was definitely all about the college football for us...
| Laura, UGA Redcoat Marching Band, 2007 |
Chicken Tortilla Rollups
5 cans Swanson or Underwood Chicken spread (I only used 3 4.25 oz cans)
3 pkgs cream cheese (8 oz pkgs. I used 2 regular and 1 1/3 fat)
1 medium jar Pace picante sauce (I used 6-8 oz.)
1 small can chopped green chilis
Finely chopped onions
Chili powder
Garlic salt
10 flour tortillas
Mix chicken spread and cream cheese together. Add picante sauce to make mixture spreadable. Add the green chilis and onions and add seasonings to taste. (I didn't this time, but I think I've added chopped green olives with pimentos in the past, as well.)
Spread on flour tortillas and roll-up. If you spread it on about 3/4 of the tortilla and tightly roll up, it squishes to the edges and makes it slightly less messy. Chill overnight (well-wrapped). Slice and serve.
The plate above shows about 5 of the tortillas, sliced. You can use any size really, but if you use the smaller ones, you'll need more than 10. This is super fast to mix up, and very popular. The chicken spread is a little weird, but mixed with everything else, it makes a very tasty appetizer!
Tuesday, November 29, 2011
Vogue 1246 is Next!
Greetings! I'm back from the holiday, and trying to get back on track with my sewing. I actually have been sewing, and finished a slip made from a vintage Butterick that I have in the shop. For details and a review, I'm sending you over to the other blog. (Whew! So much blog juggling!)
My next definite project is a new, artsy top that I've mentioned being in the queue before, but now the tissue is out of the envelope and I'm really, really going to make it. Really.
I've even done some preemptive fitting research over at Pattern Review, and found some excellent advice from ClaireOKC which will be useful because this pattern runsbig enormous! There's loose fitting, and there's "I'm wearing a tent".
Don't miss tomorrow's Wilma on Wednesday recipe... a particularly yummy and easy appetizer!
My next definite project is a new, artsy top that I've mentioned being in the queue before, but now the tissue is out of the envelope and I'm really, really going to make it. Really.
I've even done some preemptive fitting research over at Pattern Review, and found some excellent advice from ClaireOKC which will be useful because this pattern runs
Don't miss tomorrow's Wilma on Wednesday recipe... a particularly yummy and easy appetizer!
Labels:
planned projects,
Sew Vintage Today,
Vogue
Monday, November 21, 2011
Vogue 7903: A Refashion
I finally turned on my sewing machine this weekend, and came up with a quick refashion of one of my husband's dress shirts, into a blouse for me. Months ago, I bought this Sandra Betzina "Today's Fit" blouse pattern, and kept flip-flopping on what fabric to make it up in.
Then, Roland ripped a shirt. And it became a great source of fabric. (He ripped the sleeve, and not along a seam, but just in a random place by the shoulder.) And this:
Became this:
The only changes I made were to grade out at the hips and narrow 2 of the front darts for a bit of room for the fluff, and I narrowed the shoulders by 1". I'm thinking the shoulder narrowing resulted in a sleeve that is a tad too tight, and that lowering the armhole a bit should relieve that. I had meant for the cuffs to not be contrasting, but an error in sewing made that not happen. I used the contrasting color because I didn't have enough fabric, and I'm happy with the "mistake". I was able to cut the collar out of the yoke. And there is very little left. BTW, wearing my Clover pants!
If you're looking for nice shirting fabric, thrifting an extra large men's shirt is a great source. And it made it quick because I used the original buttons/buttonholes. You'll just have to get used to the buttons on the "wrong" side. Why is that anyway?
Notice the patio? Remember this?
The patio is almost finished! Yay! In other news, in my other sewing blog, I'm doing a feature every Monday on fantasy sewing, choosing a pattern for sale in my Etsy shop, and then picking 3 or so different fabrics on how I would make it up. Come on over and take a look. Click here for today's installment!
Finally, a close up of the blouse:
Roland said that it looks better on me than it did on him! I was a little worried about it looking too masculine, so the sparkly necklace (doesn't look so sparkly here) is a nice touch.
![]() |
| Vogue 7903 |
Became this:
The only changes I made were to grade out at the hips and narrow 2 of the front darts for a bit of room for the fluff, and I narrowed the shoulders by 1". I'm thinking the shoulder narrowing resulted in a sleeve that is a tad too tight, and that lowering the armhole a bit should relieve that. I had meant for the cuffs to not be contrasting, but an error in sewing made that not happen. I used the contrasting color because I didn't have enough fabric, and I'm happy with the "mistake". I was able to cut the collar out of the yoke. And there is very little left. BTW, wearing my Clover pants!
If you're looking for nice shirting fabric, thrifting an extra large men's shirt is a great source. And it made it quick because I used the original buttons/buttonholes. You'll just have to get used to the buttons on the "wrong" side. Why is that anyway?
Notice the patio? Remember this?
The patio is almost finished! Yay! In other news, in my other sewing blog, I'm doing a feature every Monday on fantasy sewing, choosing a pattern for sale in my Etsy shop, and then picking 3 or so different fabrics on how I would make it up. Come on over and take a look. Click here for today's installment!
Finally, a close up of the blouse:
Roland said that it looks better on me than it did on him! I was a little worried about it looking too masculine, so the sparkly necklace (doesn't look so sparkly here) is a nice touch.
Friday, November 18, 2011
The "Wedding Dress" In Action
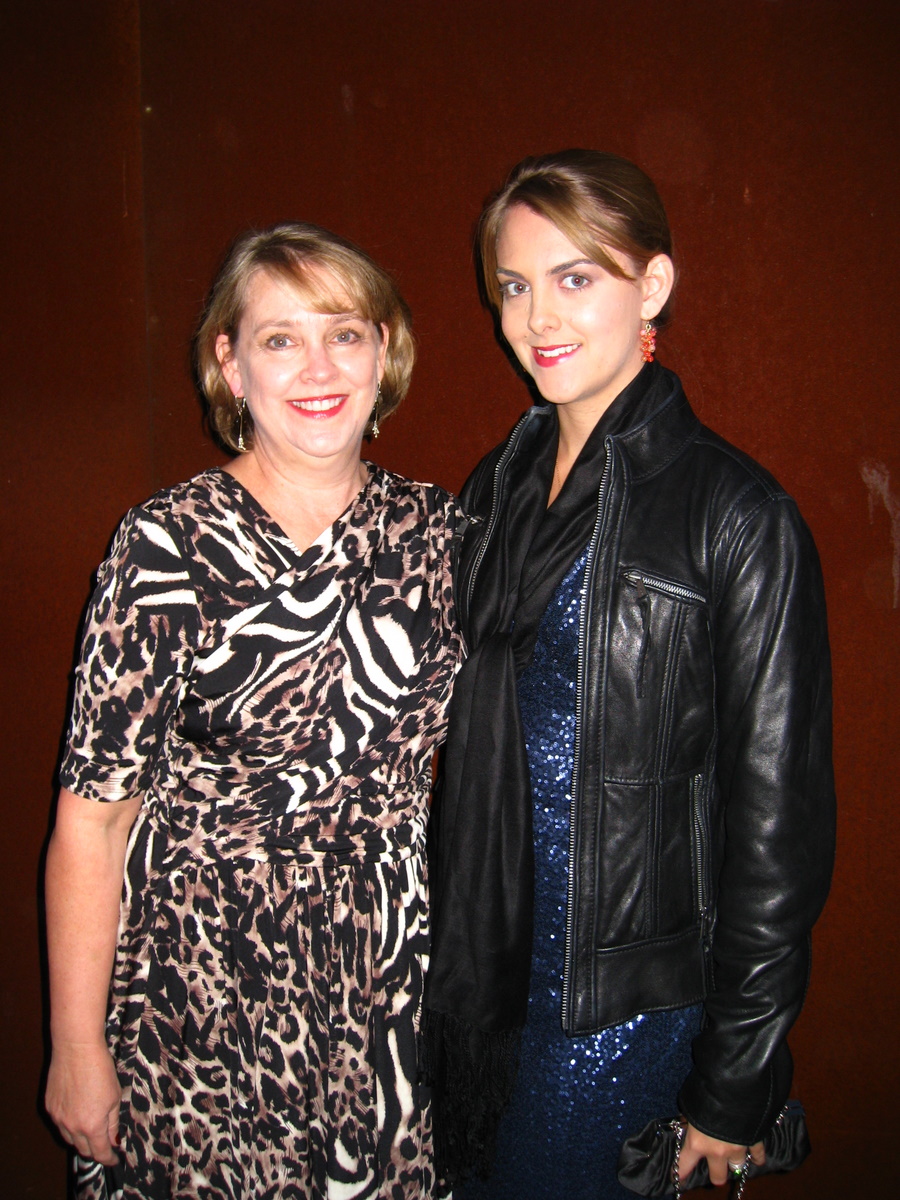
Last Friday (11-11-11) I attended the wedding of my niece, and wore the Vogue 1252 Tracy Reese animal print dress. I opted for sheer hose, "caged" platform pumps from Talbots, and bracelets and earrings from 2 of my Etsy friends.
I'll let the pictures do the talking.
with husband, Roland
shoes from Talbots
Leather bangles from Amy Fine Design
Earrings from Kristria Designs
with daughter, Laura, in a Ralph Lauren sequined dress, and Michael Kors leather jacket (all scored with great deals at a Virginia Macy's per Laura)
Laura, me and Channing Brauer, girlfriend of my nephew
my mother-in-law, Carol; sister-in-law, Kim; me; Channing; Laura; Laura's husband, Thomas
Of course, my arms look strange in most of these pictures, but all in all, the dress was really comfortable. I didn't end up tacking any of the gathers, as recommended by the pattern. It just wasn't necessary. Quite an exciting and fun evening!
Labels:
Etsy sellers,
family,
talbots,
tracy reese,
Vogue,
wedding
Subscribe to:
Posts (Atom)