Showing posts with label muslin. Show all posts

Monday, May 9, 2022

Making a Wedding Dress: Part 1


How it started...

The story begins on June 8, 2021. After trying on dresses at a popular salon, Laura and I had lunch and went over the options. She really liked one dress in particular, but just wasn't ready to commit to spending over $1400. I suggested that, if she wanted me to, we could probably create a beautiful gown for around $500. I wanted her to be sure, but the wedding was in October, so we would need to get started ASAP!

She said yes to the dressmaker, me, also known as mother of the bride and grandmother of the flower girl... there was going to be more sewing than just a bridal gown!

Getting just the right fit and style...

So off we went! She found a knock off pattern on Etsy, and I mashed together some patterns for the first muslin. No pictures of this because after the first try on (with pictures taken on her phone), she sent said pictures to her friends and it was a big NO. Back to square one.

She had a second choice dress from the try on session. Square neckline, deep scoop back, princess seams, full circle skirt with train. Simple enough, right?

So I made a second muslin.

Not too bad. Definitely had some issues. Then I started thinking. Not always a good idea in hindsight. 

I was concerned that where the center bodice met the side bodice/strap area at the square neckline, the satin, lining, potential lace would just be too much fabric. Of course I didn't decide to make any changes right away, but tinkered with this fit at least one (maybe two?) more time before going with a design that had the princess seams curve and end at the armholes instead of the neckline.

I bought real muslin! Things were getting serious now. A princess-seamed fitted bodice combined with a bride that (rightly) wanted it just so meant I really needed to get to work. 


July

More muslins, more fittings. She worked from home, so popping in for a quick try-on was easy enough.


The straps in the back seemed to be the hardest thing to get right.


Eventually, you just have to say... this is it! We can work with this one!


And so it was on to the buying of the fabric! Coming up in Part 2.


Wednesday, April 24, 2013

Three Muslins and a Pattern

I'm using a vintage McCall's pattern to make a dress for Laura's graduation next month. It's a Bust 38 which is more or less my size. For me, making a fitted, vintage pattern usually means that I'm going to have to tweak it to fit my 21st century body, and I often find that it's easier to tweak a larger pattern than a smaller one. Anyone else have that experience, no matter when the pattern was published?

I'll show y'all the pattern soon, but I'm feeling too lazy to go look up the number, etc. Suffice it to say that it is a fitted sheath with a waist seam and in a the back a faux wrap with a low V shape. Oh, to top it off, I'm using Colette's Macaron pattern for the skirt. I've made it before and know it works.

This fitted style definitely called for a muslin, at least for the bodice, and I ended up making 3! Not my usual MO that's for sure!

Number 1:
 No tweaks to the pattern except to take a 1/4" off each dart leg, and make the 5/8" seam allowance on the sides taper to 3/8" to the waist just to be able to zip it up.

Number 2:
You can see the pins at the neckline. Above the boobs, I am just much narrower than a Bust 38 size. I also had to scoop out some from the armscyes... the fabric just bunched up. In the back, I raised the "V" so that it will cover the bra. This style made it easy to shorten the back length, and I needed to add to the front length.

Number 3:
Above the boobs still needed tweaking, as you can see. That was pretty much it. All these alterations ended up with this:

The back piece is usable, but I re-traced the front piece to flatten out all those darts and tucks.

Finally, I've made the lining first, just to make sure. No pictures of that, but all is well. The bodice will be lined with a lightweight batiste for comfort, and the skirt will be lined with bemberg lining for the swish.

So... later this afternoon, I cut out the fashion fabric, plus 2 more tops. When the mood strikes to cut stuff out, you just have to go with it, amirite?

Monday, August 6, 2012

Window Seat, Part 4

Let's see, where did I leave off? Oh, yes, fabric choice. No choices have been made yet. That's how we roll here. Well, that's not entirely true. We've decided that probably, for the rug under the table, we'll just get a solid color remnant and have it bound. I think Georgia is the carpet capital of the USA and there are lots of places with remnants (or so I assume). We have purchased from one place in particular, so we just need to get our little selves down there. Rug? Well, the rug needs to go with the window seat.

In the meantime, there is work to be done anyway. If you've ever worked with this kind of foam, you know it is very grabby, so putting the covers on can be frustrating at best. To solve that, I'm making a muslin cover for each cushion that will more or less be permanent. The outer decorative cover will have a zipper so that it can be removed for washing. The muslin cover will not. It also won't be all that pretty. But it is easy to make.

I abandoned the newpaper "patterns" and just took each actual cushion to use as a template of sorts. I traced around the perimeter, added a 1/2" seam allowance and cut it out. Oh, doubled of course, since there are 2 sides.
Rinse and repeat, 3 more times for the 3 additional cushions. There are also "sides" which are 4" wide. I added up each perimeter length, and then cut strips that are 5" wide. Well, mostly I ripped, though I did cut random lengths from the scraps produced from cutting out the tops and bottoms. And that's it.

In other kitchen news, I'm still getting the odd (and by odd, I mean random) comment about the single/double sink poll, and I suppose I should let you in on the decision.
We went double. With a low saddle (which is the technical term for the middle divider). That's our actual sink. It's made from sil-granite which is 90% granite dust and 10% some kind of polymer. And that's our actual granite countertop. The faucet, etc has been installed, but I don't have a picture of that yet, because they quickly wrapped it in plastic for protection. We're to the painting stage now, so it won't be long now!!

Tuesday, December 20, 2011

Some Random Projects

In my last post, I mentioned that up next would be a skirt, but that's not true. First, I had totally forgotten about the Ruby Slip sew along (see the badge over there with the gorgeous slip?)... I have actually started on it, too. The pattern pieces are traced, and it turns out my lace is too narrow. Sherry will be posting some instructions on dealing with that, so I'm waiting for that. In the meantime, I cut out the skirt, sort of using her instructions.
No fancy pattern weights for me, just some heavy books. Sherry recommends tracing around the pieces, drawn on heavier paper (mine are on regular tracing paper), with chalk. I used *ahem* a fine line sharpie. Whatever works!
Good results!
Next, instead of the skirt (which is temporarily being put on hold until after the new year), I'm working on a 1953 Simplicity blouse, and decided to make a muslin. The blouse pattern:
I want to make the 3/4 length sleeve, and I hope my amount of fabric will cooperate. Bust 36 is my size, but I am not wasp-ish of waist, so a bit of alteration was in order. It has darts and tucks, which I could have just eliminated, but I think it give a nice silhouette, so I just did some slashing and spreading. I'll show you some pictures of the tissue in a future post. I did make a muslin, and I had lowered the bust dart (do you see it in the drawing just under the armpit?), but lowered it too much.
By about an inch. Ugh... so I sort of fixed it in the muslin on the other side, but definitely fixed it on the tissue.
Harder to see in this picture, but trust me, it is better. Finally, I made a sway back adjustment, by "scientifically" sewing a huge tuck across the back (and then translating it to the tissue, adding length back in on the hemline).
Finally, I finished a knitting project... I think I'll show you that on Thursday. I went to the CVS pharmacy Minute Clinic today, and it turns out I have an ear infection, and a sinus infection. Yay for antibiotics. I have to summon up some energy because most of my presents are unwrapped, and the tree still is naked!


I hope all your holiday preparations are going well! And Happy Hanukkah to any of my Jewish readers!

Thursday, October 20, 2011

Muslin Progress on Vogue 1252

The days are speeding by, and while I haven't done a countdown until our trip to the midwest, I'm feeling a bit of pressure. The Tracy Reese dress really has to fit well, so the other day I cut out a muslin using a horrible doubleknit polyester shiny thing. My actual fabric has a bit more stretch, so I'm keeping that in mind.


Anyway, I cut out a straight 14, and, well, let me show you another picture to get it in your mind.
I really had to plan the muslin, because I didn't want to make the entire dress, but the underneath fitted part. Does that make sense? So, full skirt... not making. Did cut out the sleeves, the left and right yoke fronts, and the upper back. Eliminated the drape from the left shoulder, and the bodice part that is all ruched. So, that just left the bodice lining.


I took a bunch of pictures, but most are just for my eyes only. Yeah... you just don't want to see these. That might make you think it isn't working, but actually it's really pretty good, and I'm only making a few changes.
#1... the sleeves are about an inch (maybe a little less) too long. Easy. The shoulders fit well, as does the bust area. I think the jersey will gather much more attractively than this hideous stuff. It might look ok in the picture, but it's actually scratchy.
#2... the bodice needs to be longer. Probably a couple of inches longer. The waistline is unbelievably high. Too much white flesh to show you below the cropping, but trust me, that's just about where the bodice ends in the picture.


And that's it! The jersey should stretch nicely, so even though my waist measurement is *ahem* bigger than the pattern, it's not an issue. And, I did the official technique of holding up the tissue to my body, and the skirt looks like a good length.


The goal now... get it cut out, and make some good progress by the end of the weekend. 

Tuesday, March 29, 2011

Not Quite a Muslin, Not Quite a Wadder

I can already knock the first 2 things off my list!
As planned, I made this top, intending to use it as a summer pj top. Out of character, I cut size 12, without first making any changes. (Usually, I can't resist tinkering with the fit before I do anything.) I made view D (the yellow one) without the flower, and with a tie closure (like view A). I also made some pj shorts, that took probably less than an hour to make. I used what is essentially my TNT pj pants pattern, but did make one big change (other than cutting it off for shorts). [how many times can YOU use sentences with parentheses in one paragraph!!]

How did it go? Well, it's a super easy top to make. I didn't use the facings, but instead used a bias strip, and stitched it to the outside for a contrast. It turns out, I didn't have enough fabric to make the shorts and top matching, so I used the shorts fabric for the sleeves, ties and bias strips. The sleeves are also finished with bias strips, a nice detail.
 I also really like the split sleeve. But the fit. All the problems are in the chest area. Yep, lots of gaping, necessitating a snap. Also, the darts are a little high. This is not going to become one my Over the Top tops, mostly because I can't be bothered to make those changes. Maybe later in the summer though. For pjs it's fine.

For the shorts, I made these babies as easy as possible! First, I used my coverstitch machine to hem the shorts and the top. Then, instead of a waistband with elastic, I used the coverstitch again, this time to attach the elastic.
Cute, huh? I folded over the top of the shorts 1/2" and pressed. The elastic is 5/8" and I wanted just a bit to show. Then I just cut the elastic a little snugger than my waist measurement, stitched the ends together, divided the elastic into quarters, pinned it at the side seams and front and back seam, and stretched as I stitched. That's it!


Tuesday, March 15, 2011

Jacket Progress

I've tweaked muslin #1, and I think now I'll let it "rest". I'm pretty happy with the results, but will need to do just a bit of further tweaking. Questions I have for y'all?
  1. Do you like the length?
  2. Do you think I should do a bit more "fitting" to the front? Remember, there are welt pockets to be dealt with if I do.
  3. Did I make the shoulder TOO narrow, or does it look just right (from what you can tell)?
When you look at the pictures, ignore the sleeveless side. I only made changes to the side with the sleeve, except for taking in the side seams, and adding the back darts (which need to be raised or lengthened toward the neckline) just a bit.
You can see all these pictures, plus a few more, in flickr, with better descriptions of what I did. And please don't worry about your eyes, I think the tripod is tilted so it's not you, it's me.

While this project is resting, I have a couple more on the drawing board. I won a fabulous giveaway of four patterns for tops from Faye, and I have the perfect fabric for one of them, so this one is first up:

Thanks, Faye!! I'm going to make the short sleeve brown view.

Finally, many of you know that my son has had some recent difficulties. I've decided to separate out any discussion of that, and have started a new blog dealing with only that. I'm not really going to promote it at all here (except for right now, in this post), as I'm trying to maintain some anonymity, but please feel free to drop by and follow if you are at all interested in the subject of mental illness.

Sunday, March 13, 2011

Muslin #1 for the RTW Tailoring Sew Along

I'm anxious to get started on this sew along, so I've made the first muslin for my pattern. Just a reminder, this is the pattern I'm making:
The red one, with some pretty drastic alterations in the style department. The pattern really does have some good "bones" though, and I was pleasantly surprised at the fit. For once, I only made ONE change before I started and that was to shorten it by 2". Here's your first look (admittedly the fabric is very light weight, and the final jacket will be more medium weight):
 Right off the bat, you can see it's too big, but not really that much. Most of the "bigness" is the sleeve, which is too long, and too loose-fitting, and the armscye which is too low. That last problem is kind of a relief after all the modern day patterns I've used lately that have armholes so high they cut off the circulation to your arm. I also think there may be too much double breasted overlap, and for the next version I think I will remove 5/8" from each center side, and also 5/8" from the collar. I also want to round the corners of the collar.

Again, here, mostly sleeve issues. The side seam falls nicely straight (can't see that very well, sorry), and the shoulder seam hits at the proper place. The shoulders are just a bit wide. Since the darts come from the shoulder seam, I think I'll try widening the darts 1/4" on each side to solve the shoulder width problem.

There is kind of a glare on this picture. It's a gorgeous day today, so sunny, but that makes taking pictures a bit harder. Anyway, I want the back to be closer fitting, and I'll add contouring darts to the back to accomplish that. The side seams are perfectly straight, and I'll play around with making them a little more "hourglass". I have more of a rectangle figure, but this jacket does make me look boxier than ever! Finally, it's still longer than I want, so I'll cut another 2" off the hem, and see where that takes us. The welt pockets seem a little high, but when I shorten it, they may have to stay a little high. Of course, the button placement will have to be adjusted.

Sunday, February 13, 2011

Vintage Formal Muslin Challenge

Since the new year began, I've had a post in mind that I really wanted to write... Sew Along Envy! There were so many sew alongs that started that I was interested in, but I just couldn't commit. One that I was particularly interested in was the Great Vintage Sew Along, and I hope it's successful and repeated. The dress that I'm making now is what I would have made. Yes, I've had this one planned out for awhile.

So now about this pattern. The bodice is all I'm muslining, and there are 2 main challenges. The first is fit. I do not have a vintage body. No waspy waist here. Every time I make a muslin, I plan to make it "as is" first, and then do the tweaking. But really, if you know you are going to need to add about 6" or so to the waist, well, why not go ahead with that change.

So, that's all I did initially. Most of my "width" is in the front, so I only added 1/2" to each side seam on the back. There are 4 waistline darts in the front, so I shaved 1/4" off each dart "leg", and then added another 1-1/2" to each side seam. Oh, and almost forgot, moved the darts 1/2" toward the center on each side. Seems the girls are closer together than the darts.

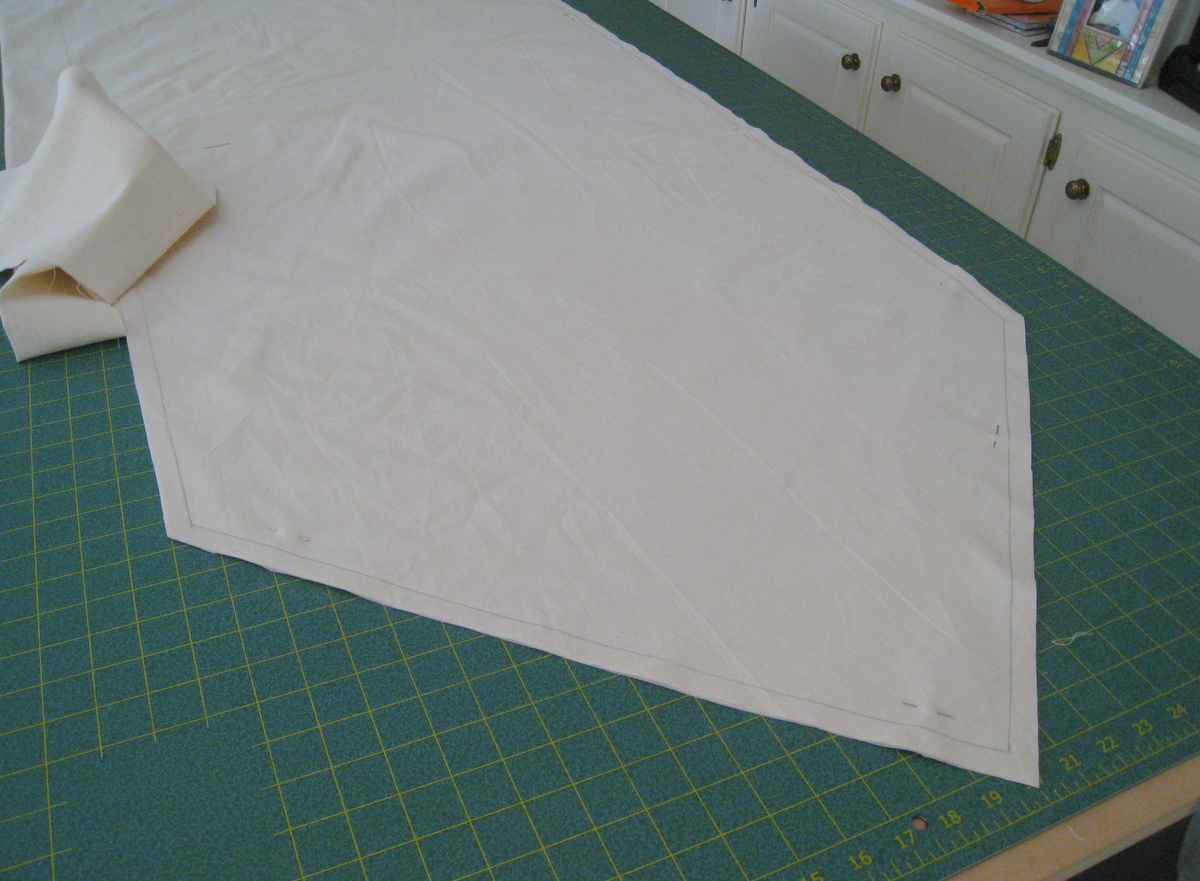
Challenge #2 is the construction. There are 4 pieces: bodice front and back, and a sleeve and yoke combo piece for the front and back. There is a seam at the shoulder that runs the length of the sleeve.

Ordinarily, I do all my seams in machine basting length for easy rip out. However, this is a tricky attachment so I made the stitches only slightly longer than a regular stitch. The pattern instructions have you sew with the bodice piece on top, and do it all in one go, pivoting at the "peak". They do give you 3 options for reinforcing that V on the sleeve/yoke piece. They are kind of funny... I'll do a "funny vintage pattern instructions" post another time.

Since I had already tried this last year, I decided to experiment, and had 4 chances to get it right. Step one, do each attachment separately. By that I mean:
Actually, what I should say is first, stay stitch the seamlines on both pieces. Then stitch the sleeve seam. I did that on the front.
When pinning and stitching the yoke seam, the yoke will be clipped. When I did the front, I discovered it was easier and more accurate to stitch with the sleeve/yoke piece on top, so that's what I'll do for the real thing.
Now for the fitting. The pattern is a Bust 36, and while that matches my measurements, in reality, I have kind of a narrow upper chest, so the neckline was far too wide, and the under bust area turned out to be too loose. I ended up taking about an inch or so on the neckline by pinching out small darts on the front and back. I also just cinched up the side seams by sewing more of an hourglass seam. Now for the blurry pictures of me actually wearing it. I tried to crop out the worst of the muffin top to spare your eyes.

In this version, I cinched up the side seams just a wee bit much. You can see the pulling, horizontal lines there around my middle. I came back out just a bit, and it fixed that right up. There is a big wrinkle still by my armpit, but the top of the shoulder is finished with a bit of elastic, and I think that will pull it up enough to remove it. I may sew the shoulder seam just a bit deeper, as well. Now the back view, which is pretty hideous, but if you've stuck it out this far, well, here ya go:
Oh, I did do a sway back adjustment. I think that where the waistline hits now is actually a good spot, so I'll add a seam allowance to the bottom, lengthening the bodice just a little bit. And yes, I did put a zipper in. I find it very frustrating to work with a bodice that you just are trying to pin on, so it's basted in, and can be easily ripped out.

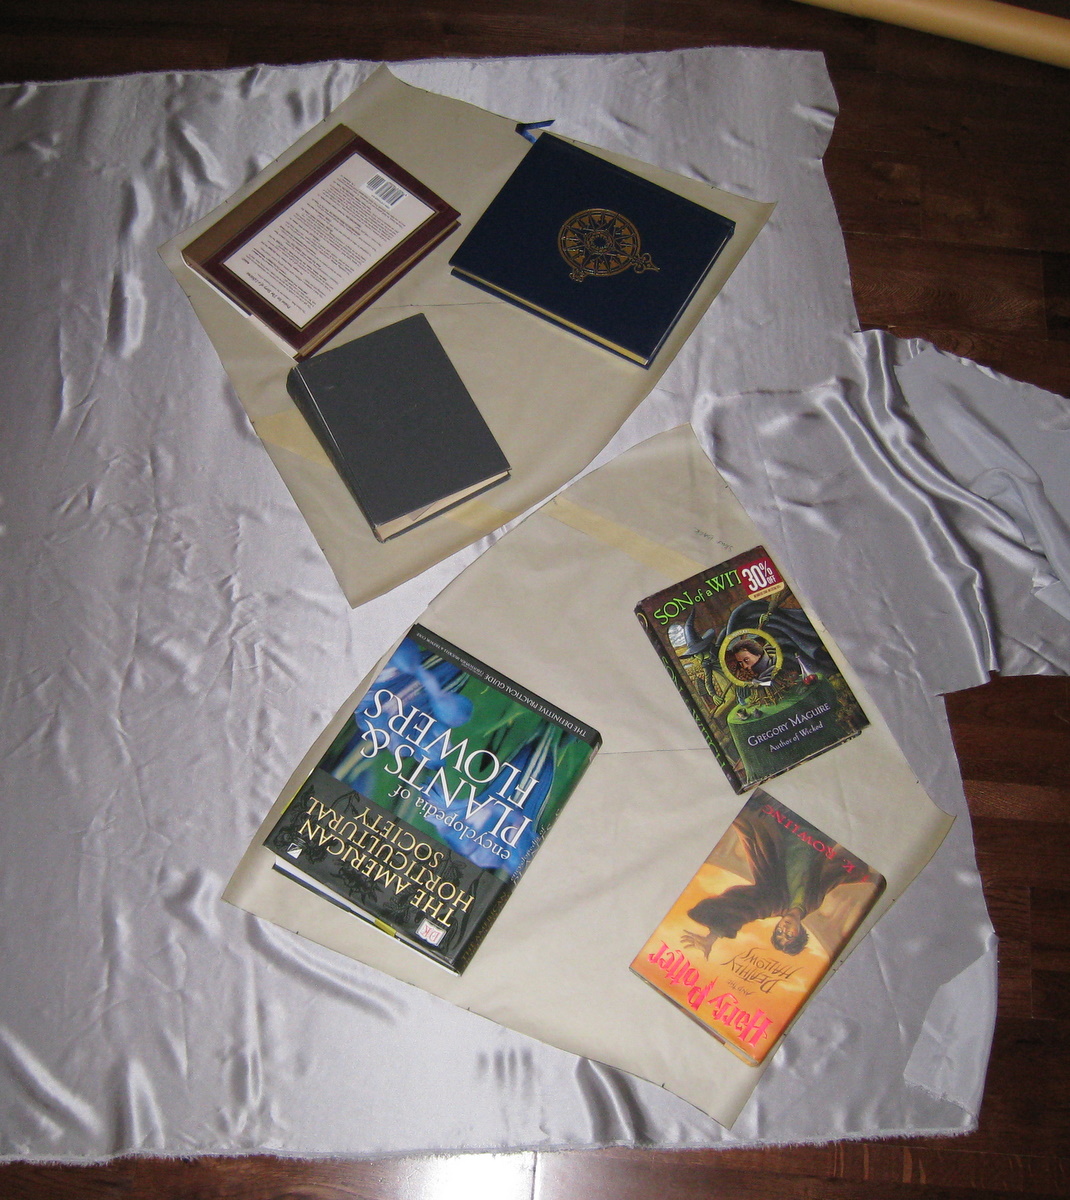
A couple of final thoughts... in the original design the bodice has buttons, and then the skirt has a zipper. I think I'm just going to put an invisible zipper in the whole thing and be done with it. I'm also going to use, for the first time, the muslin as pattern pieces, at least the 2 main bodice pieces. I think I'm just going to cut them along the seam, and then add seam allowances, though the jury is still out on that decision.

I'll talk about the skirt portion tomorrow, and show you the fabric.

Saturday, September 25, 2010

Lady Grey "It's SO FLUFFY" Coat

Let's just get this out of the way:


I've made my second muslin and this time I used fleece which is closer in weight to the wool that I've chosen. So, what changes did I make? Here ya go:

First, please ignore the wonky hem. I lengthened the pattern, and then turned up the hem, just to get an idea. I like the length. I shortened the sleeves. Are they too short now? That's an easy fix.

I made the lapels and collar slightly smaller. I think I like this better. And I deepened the armscye 3/4". That seems like a lot, but it feels so much better, and will allow those winter clothes that eventually we may need. (The ceiling fan AND another fan, plus the AC, are going for this photo shoot!)

I stuck with the size 10, but graded out to a 12 at the waist on all the seams and then back to the 10. Then, when I stitched the princess seams, about 2-3" above and below the waist, I used a 1/2" seam allowance, then back to the 5/8". I don't think that will be necessary at all on the front and will stick with 5/8" SA all the way.

Now for the back view:
I think I will keep the 1/2" SA on the princess seams for the back. It's a bit wrinkled looking, but that is really from the belt. Take a look without the belt:
The back is much better, and I think with a lining, many of those wrinkles will not be in evidence.

The thing I'm most concerned about on the back is how the shoulders look kind of droopy, and it generally seems a bit too wide. I'm wearing sweater underneath, and it's plenty comfy, so I think I can do a bit of narrowing at about the halfway mark on the armhole on up to the shoulder on the back and the front. No more than 1/2" narrower. I'll unstitch and try again and see what happens.

I'm feeling pretty good about this version, and it will come in handy as a bathrobe, I think. Or not.

LinkWithin

Related Posts with Thumbnails