A new project, but not a sewing project. Well, sewing will be involved, but mostly indirectly. Well, not exactly indirectly, but...
OK, that's getting too confusing. I'm starting a new blog. I'm keeping this one going too, but the new one is going to be less "all about sewing" and more "all about me". Yeah, that sounds a bit, oh, what's the word, self-indulgent. But that's the truth.
Let's review. Blog "A" (It's a Sewing Life) will continue to be active, and will continue to awe and amaze you with awesome and amazing sewing projects. Wait. What window seat covers? There will also be more actual sewing with the vintage patterns I'm selling over there on etsy. Gratuitous plug for Etsy shop. I've joined Sew Weekly, and will attempt to connect at least some of the weekly challenges with vintage patterns. I mean, what's the point of having hundreds of amazing (and ok, some less than amazing) vintage patterns if you don't actually use a few before selling them. Exactly.
Blog "B" (Project:Uninvisible) will definitely be more personal in that I'll be exploring ways to change my family role as angst and anxiety ridden "lost child" that I have brought with me from my original family to my current family. It seems that the empty nest has left me a bit more unmoored than is really comfortable, and if I am going to really explore my identity and role presently and going forward, I'm going to have to put it all out there. Warning: I'm going to try really, really, really hard not to censor myself, and I'll be putting some opinions out there that I suspect even my closest friends and family members (immediate family excluded) don't even know about.
So why am I bringing this up here, in this nice family friendly little sewing blog? Well, if I'm going to put myself out there and become truly "visible", then I'm going to need some friends, and I'm inviting y'all to drop by and see what's going on in this little ol' head of mine. Sort of a worldwide group therapy, if you will.
It's definitely a Work in Progress, true of blogs as well as sewing projects and Life! The first post is up, so if you want to follow along, you'll be with me from the start.
How about some art? Well, if you want to see it, you'll have to click on over to the new blog.
Showing posts with label work in progress. Show all posts
Showing posts with label work in progress. Show all posts
Wednesday, August 29, 2012
Sunday, July 29, 2012
Window Seat, Part II
This window seat is a multi-step project, and I've decided to show you step by step what I'm doing, rather than just a big reveal. There is even a video today for your enjoyment. Not sure how much information I'm actually imparting, but you can see what I sound like.
Anyway, recapping, so far I've bought the foam and made the pattern. The next thing to do is to cut the foam into the shapes that I need. Remember that my window seat is fitting into the bay window and that's giving mefits the opportunity to make 4 cushions to fit onto the platform, kind of like a puzzle. Here are 2 of the 4 positioned onto their designated foam piece.
 By the way, I'm doing this project in the kitchen reno area, basically to keep as much dog hair away from the foam as possible. It's like a magnet for the fur!
 I traced around each pattern piece. Note that I also marked the perpendicular line on the side to help guide the knife. OK. Are you ready? I've made a video! This has taken me literally hours to make and then figure out how to add the little title slides at the beginning and the end (which really just flash the info at you). Clearly, I have room for improvement for my movie making skills.
Whew! The electric knife really does make the project so much easier. After I finished cutting all 4 pieces, I did have to make some adjustments to make it fit just so onto the window seat.

Next up: Fabric selection.
Anyway, recapping, so far I've bought the foam and made the pattern. The next thing to do is to cut the foam into the shapes that I need. Remember that my window seat is fitting into the bay window and that's giving me


Next up: Fabric selection.
Monday, December 12, 2011
Hot, Red Silk
Now there's a title! I've been working on something that's, well, germy, all weekend. Going through the symptoms of a cold as it progresses from slightly scratchy throat to today's fun of totally stuffed up head, blocking all sense of hearing, smell and taste alternating with the non-stop faucet of a toddler's runny nose.
That's a pretty picture, no?
Here's my catch up from the weekend, Debbie Cook style (apologies, Debbie, but my brain has been stuffed with cotton and bullet points are really the best I can do, plus I kinda love this kind of wrap up, and I feel compelled to copy):

That's a pretty picture, no?
Here's my catch up from the weekend, Debbie Cook style (apologies, Debbie, but my brain has been stuffed with cotton and bullet points are really the best I can do, plus I kinda love this kind of wrap up, and I feel compelled to copy):
- I finished my denim clovers Friday.
- Picture tomorrow.
- They zip in the front instead of the side.
- Inspired by sallieoh.
- Mine won't really look like hers do though.
- I can't really keep up with 2 sewing blogs.
- SewVintageToday will be moving back on over here.
- Wordpress is harder to figure out than blogger.
- Sewing is sewing whether I'm using a new pattern or a vintage one.
- And even if I'm trying to sell the vintage patterns.
- Shameless reminder, vintage patterns for sale here.
- I'm not sewing any Christmas gifts.
- I've hardly even bought any and Christmas is less than 2 weeks away.
- I am knitting one Christmas gift.
- I should be knitting right now.
- I cut out a cotton/silk/poplin blend Hapi Coat today.
- What the heck is a Hapi coat?

And it's even going to be red.
And a silk (a blend, but still). The jury is out on the hot.
Thursday, November 3, 2011
I Lied
The "wedding dress" won't be revealed today. I'm holding on for tomorrow. Turns out, after trying it on, there was a major gaping issue with the back neckline that has to be remedied, and alas, the remedy will not fit into my sewing time schedule for today. I did assess what needs to be done.
In the meantime, I whipped up a muslin for the Clover pants that I had cut out last week. No pictures because there is a major fit issue (but shouldn't be a difficult fix). This will NOT be a wearable muslin (though it was never intended to be).
I was greatly amused by the comments on yesterday's recipe. Turns out people have a real relationship with the tuna casseroles of their past. I do have a tuna recipe with noodles as well, so you'll have that to look forward to, lol! Maybe for next week, I'll do something in the dessert category!
How about a little southern fall foliage for your viewing enjoyment. Last Saturday was our 28th wedding anniversary, and we spent part of the day at the State Botanical Garden of Georgia.


In the meantime, I whipped up a muslin for the Clover pants that I had cut out last week. No pictures because there is a major fit issue (but shouldn't be a difficult fix). This will NOT be a wearable muslin (though it was never intended to be).
I was greatly amused by the comments on yesterday's recipe. Turns out people have a real relationship with the tuna casseroles of their past. I do have a tuna recipe with noodles as well, so you'll have that to look forward to, lol! Maybe for next week, I'll do something in the dessert category!
How about a little southern fall foliage for your viewing enjoyment. Last Saturday was our 28th wedding anniversary, and we spent part of the day at the State Botanical Garden of Georgia.


Monday, October 24, 2011
Wedding Dress Sneak Peak
Not that kind of wedding dress, sillies! But the kind of dress you wear when you are invited to a wedding. One that suggests you "dress to impress". And one that is TWO WEEKS from Friday.
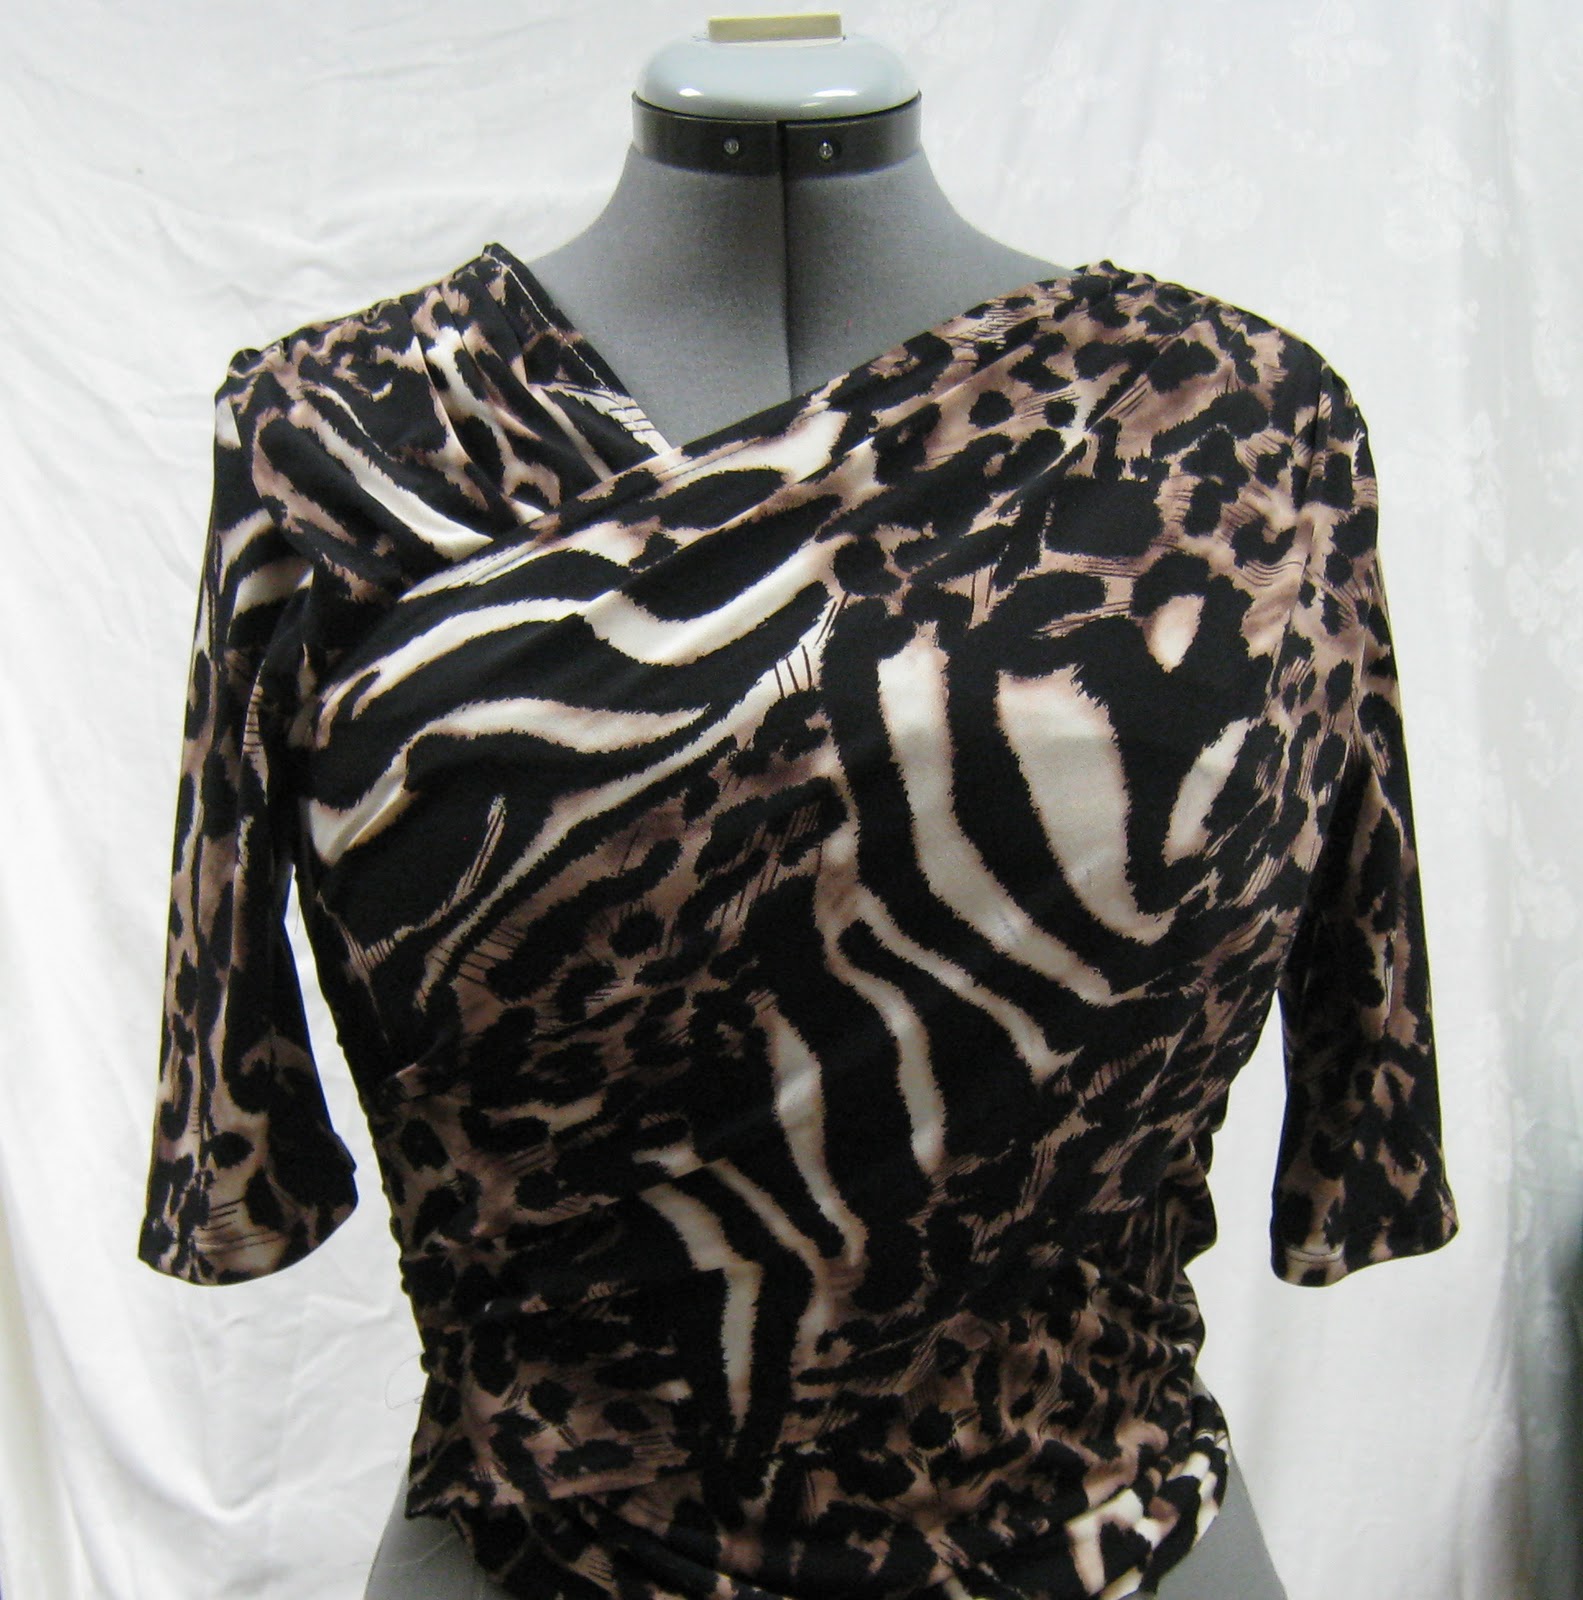
Not too much pressure, but this Vogue 1252 has 63 steps. I've finished 31 and have 32 left, so yep, about halfway and it brings me to the skirt. Here's the top so far:
 Wanna see more? Me too. I'm off to a shopping trip to my favorite fabric.com for some more skirt lining. I bought the mesh as recommended for the lining, but for the skirt I just want some slick black tricot, for spinning drama if there is dancing.
Not too much pressure, but this Vogue 1252 has 63 steps. I've finished 31 and have 32 left, so yep, about halfway and it brings me to the skirt. Here's the top so far:
Tuesday, December 14, 2010
Macaron -- Early Production Notes
Kind of a sneak peek here. I've been working on the Macaron, and wanted to share a few notes. First, the contrast fabric. I had already purchased a fabulous stretchy wool from Gorgeous Fabrics for the body, but felt like the yoke selection could make or break this dress. After browsing online, I really wanted to feel some fabric, and ended up at Gail K's, a local fabric institution. Ordinarily, you are completely ignored as you browse there, but this time, Gail (although not THE Gail K) almost immediately approached me. I had a swatch of the gray wool, and after explaining the design, she immediately led me to this:
 It's silk. And you may be noticing that huge white flaw down the middle. Well, apparently, this is silk to make ties out of, and the owner must have gotten it for a song, because it was only $4/yard! And on top of that, everything in the store is 20% off til the end of the year. And it was a perfect match. But.
I think you get what you pay for. Or, it's just silk. Anyway, it moved and grooved all over and in the end, I used a Pro-Sheer elegance fusible interfacing on the yoke pieces to stabilize it.
Second. Biggest design change is moving the zipper from the side to the back. So, I constructed the back, and have inserted the invisible zipper. [Basically, the pattern instructions call for constructing the back and front bodice, then sewing the shoulder seams. I just went ahead and attached the skirt as well.


I think you get what you pay for. Or, it's just silk. Anyway, it moved and grooved all over and in the end, I used a Pro-Sheer elegance fusible interfacing on the yoke pieces to stabilize it.
Second. Biggest design change is moving the zipper from the side to the back. So, I constructed the back, and have inserted the invisible zipper. [Basically, the pattern instructions call for constructing the back and front bodice, then sewing the shoulder seams. I just went ahead and attached the skirt as well.

All pieces cut out and sorted.
Third. The pattern calls for the yoke and bodice sewn together in an interesting, flat, from the right side fashion. Kind of top stitched on, if you will. I did it more conventionally, right sides together, staystitching each piece, and clipping curves where necessary.
Fourth. I'm lining the whole thing. With silk apparently, but I'll have to confirm that. For the yoke, I'm simply underlining, basting the silk to silk, and treating it as one piece. I'll use a French seam for the shoulders. I'll explain how I'm doing the rest of the lining in another post.
Fifth. (I didn't really mean for this to get so long) The midriff piece in the original design is the contrast fabric, but I've decided to use the wool, and made piping from the yoke silk to outline. OK, I think that's it. Have a look:

Saturday, November 20, 2010
Another Coat?
It's true! My next current project is another coat, but this one is proving to be pretty easy. I'm making Amy Butler's Rainy Day coat, and I'm making it for Laura. She's young, she's hip, she's trendy conservative. I thought she might opt for a funky laminate print, but no. She chose black. A high end, raincoating fabric from Gorgeous Fabrics, but black.
 She's applying to graduate schools, and everywhere she's applying is in a much colder climate than she currently lives in, so I decided to add some warmth to this raincoat by quilting the body lining with this:
 I've done a bit of machine quilting in the past, and this really isn't difficult. There are a couple of ways to go about it. The easiest way is to simply pre-quilt your fabric before you cut it out, but where is the fun in that? No, I cut out my lining pieces, and then proceeded to quilt them.
Some tips. You want to have your batting a bit larger than your pattern piece because it tends to draw up just a bit as you quilt. I'm only using batting and the lining without a third layer, as the edge of the lining is folded into the hem. Then there are the darts, front and back. I didn't want the extra bulk from stitching the darts in the batting, so I just cut them out and "sutured" them together. Like this:


This keeps the 3 dimensionality effect caused by the darts, but eliminates any bulk. Then I marked my quilting lines, and "basted" the pieces together with quilter's safety pins. These little pins are purposely bent to make them easy to use. To mark the fabric, I used a 24" long quilter's ruler, and marked diagonal lines every 2" using a chalk pen. I'm not sure the exact name, but it's like a little pen, with a chalk compartment and a little wheel on the bottom where the chalk comes out.
Are you just dying to see the lining fabric? Here it is, a Joel Dewberry home dec fabric from fabric.com that is a wonderful weight 100% cotton.
 Make sure you mark before you pin, or it can be a real nuisance. Because this is lining, and will only be seen in limited amounts, I didn't obsess over the distortion caused from the darts, or the mistakes that I made. Especially the line that was marked 3" apart. Egads! Doing the machine quilting can become kind of zen like as I just made my way over the fabric, stopping just into the seam allowance (which was marked). I want to be able to trim away the batting easily in the SA.
Another cool tool I used was some quilter's gloves that have rubberized tips that help you guide your fabric. It's amazing how slick cotton can feel as you try to manuver it. (Ignore the dirty fingertips, please.) I think rubber gloves might work just as well. And almost forgot to mention, but if you have one, a walking foot makes this job so easy, and really does minimize the drawing up and "crawling" that one fabric can do over another one.

Tomorrow I plan to cut out the outside raincoating fabric, and could possibly have it finished by Monday or Tuesday! I'll be seeing her over the Thanksgiving holiday, so it would be great to deliver it in person.


Some tips. You want to have your batting a bit larger than your pattern piece because it tends to draw up just a bit as you quilt. I'm only using batting and the lining without a third layer, as the edge of the lining is folded into the hem. Then there are the darts, front and back. I didn't want the extra bulk from stitching the darts in the batting, so I just cut them out and "sutured" them together. Like this:


This keeps the 3 dimensionality effect caused by the darts, but eliminates any bulk. Then I marked my quilting lines, and "basted" the pieces together with quilter's safety pins. These little pins are purposely bent to make them easy to use. To mark the fabric, I used a 24" long quilter's ruler, and marked diagonal lines every 2" using a chalk pen. I'm not sure the exact name, but it's like a little pen, with a chalk compartment and a little wheel on the bottom where the chalk comes out.
Are you just dying to see the lining fabric? Here it is, a Joel Dewberry home dec fabric from fabric.com that is a wonderful weight 100% cotton.

Another cool tool I used was some quilter's gloves that have rubberized tips that help you guide your fabric. It's amazing how slick cotton can feel as you try to manuver it. (Ignore the dirty fingertips, please.) I think rubber gloves might work just as well. And almost forgot to mention, but if you have one, a walking foot makes this job so easy, and really does minimize the drawing up and "crawling" that one fabric can do over another one.

Tomorrow I plan to cut out the outside raincoating fabric, and could possibly have it finished by Monday or Tuesday! I'll be seeing her over the Thanksgiving holiday, so it would be great to deliver it in person.
Tuesday, March 9, 2010
Don't Let This Happen to You
I've admitted it before, but although I've been sewing since there were dinosaurs, I've only put in one invisible zipper. This pink dress (aka the dress that is taking forever, but shouldn't really) has an invisible zipper and I tackled it today. It took way longer than was really necessary.
Try #1: Looked great, but the waistband seams didn't match up very well, and one side didn't seem sewn close enough to the zipper teeth.
Fix: Resew the one side, making sure the teeth were properly in the groove of my zipper foot. Ponder ripping out the other side to make the seams match up better.
OK. I just couldn't stand it, and I ripped it out and redid it. But:


Try #1: Looked great, but the waistband seams didn't match up very well, and one side didn't seem sewn close enough to the zipper teeth.
Fix: Resew the one side, making sure the teeth were properly in the groove of my zipper foot. Ponder ripping out the other side to make the seams match up better.
OK. I just couldn't stand it, and I ripped it out and redid it. But:

I'm not sure if you can tell in the picture, but the resewn side is twisted, and while it appears to be sewn on correctly, when you get down to the pull you, um, can't close the zipper. There is no fix for this but to rip it out again. First, you must go eat lunch. Walking away helps.

Now it's right. Untwisted and resewn. The moral of this story: When sewing the second side of an invisible zipper, make sure it's flat all the way down and does not get twisted.
Friday, March 5, 2010
Gingher vs. Olfa

So, if you read my little rant yesterday about the evils of cutting out pattern pieces, you may have noticed that a couple of my commenters mentioned that they cut things out with their rotary cutters. *slapping forehead with hand* Of course! Why not? It's not like I had to rush out and buy a rotary cutter for this little picture. I'VE OWNED ONE SINCE 1982!! That was the year I made my first quilt.
The problem is that my mind had compartmentalized these sewing tools. Olfa cutters = making quilts. Using scissors = making everything else. It's high time I got with the program, and since I hadn't yet cut out the lining to the glorious pink dress, I did it this morning. With the rotary cutter. The results? Fabulous!
So, as I write my little sewing posts, I hope that nobody hesitates to give me tips. It may seem that I've been sewing forever and should know all the little tricks, but apparently... I don't.
I've been battling a cold, so projects are moving along very slowly, but I did also manage to get 2 monograms stitched out. I love monograms. They are so classic and elegant, and the brides that chose these have great taste:


Tuesday, January 12, 2010
A New Sewing Skill
I have been sewing for a long time, and I hinted a couple of posts back about a new skill that I wanted to try. A reader guessed right... it's learning how to put in an invisible zipper (IZ). I don't know why I hadn't done it before, but I haven't made many adult garments since my daughter was born 22 years ago. Lots of kids clothes, quilts and curtains, but nothing for me.
So, I'm starting with Simplicity 2564, an easy skirt pattern that I chose because I love the straight line, the yoke and the back vent. Many people have zipper fear. Not me, but I just needed to learn a very easy technique. Of course, you can't follow the pattern instructions because with the IZ you don't sew the seam first. If you're a pattern follower and this makes you nervous, trust me, it will be ok.
I did have to remember to sew the back yoke pieces to the back skirt pieces. I didn't serge the yoke edges because they will be completely enclosed in the yoke facings.


So, I'm starting with Simplicity 2564, an easy skirt pattern that I chose because I love the straight line, the yoke and the back vent. Many people have zipper fear. Not me, but I just needed to learn a very easy technique. Of course, you can't follow the pattern instructions because with the IZ you don't sew the seam first. If you're a pattern follower and this makes you nervous, trust me, it will be ok.
I did have to remember to sew the back yoke pieces to the back skirt pieces. I didn't serge the yoke edges because they will be completely enclosed in the yoke facings.

Back skirt pieces ready for the zipper
Did you notice the zipper foot in the picture? I had purchased the IZ foot for my machine a while ago. So how did I learn the skill? First I watched the video on the Bernina USA website, and searched for tutorials, and there is no shortage. Honestly, the video was the most helpful. While many of the tutorials advise ironing the zipper teeth flat, with the Bernina foot, according the video you don't need to do that step, so I didn't.

Left side done, right side in action
Once you sew each side as far as you can, you're almost done. From there, you pin the back seam from the end of the zipper sewing to the bottom. In this case, there was the vent to consider. I basically followed the instructions for the vent and sewed the back seam together.

Finished
I'm not thrilled about the way the yoke seams match up, but it's nothing I can't live with, and I do love the way the seam looks with an invisible zipper. And they are so easy to put in! Now I just need to finish the rest!
Subscribe to:
Posts (Atom)
LinkWithin
