Showing posts with label Lady Grey. Show all posts

Wednesday, November 17, 2010

Lady Grey is So Finished!

Do I look happy? Well, I am! On Sunday, I was actually kind of hating this coat. Sewing fatigue, maybe? But I did something really simple, and it totally changed the look and the way I felt about it. What is it you ask? I simply topstitched around the entire front edge, lapels and collar. That's it. You see, I hadn't done any topstitching, but this left the front edge and lapels weirdly poofy and no amount of ironing was going to tame them. I had even understitched the facing up to the lapels and around the neckline. But, no. Anyway, it's done and I've blogged a lot about alterations and muslins and the process, so today, just a few observations and some more pictures.

Gratuitous gorgeous sunny fall day picture. Too sunny really to get good pictures.

 I'm happy with the fit for the most part. And enjoyed the tailoring process.

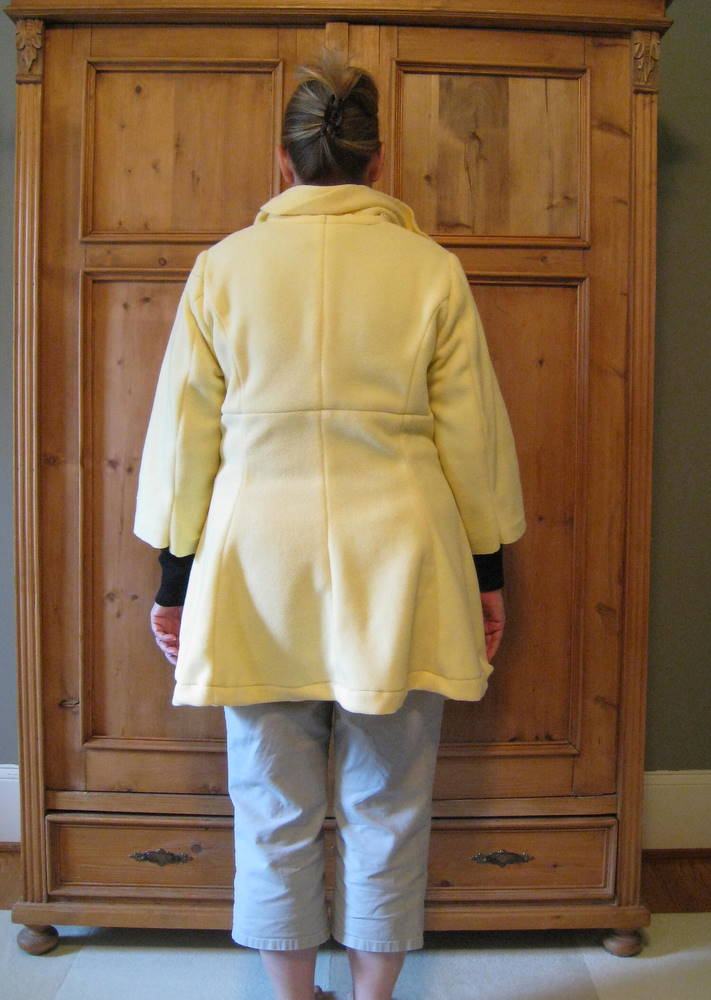
There is still that wrinkle across the back, in spite of the sway back adjustment. Oh well. I'll live.

Hard to see in the picture, but each belt loop has four lines of topstitching. The first two were kind of uneven and I was too lazy to make new ones, so I added 2 more lines of stitching and I kind of like the effect.

I added those really big snaps instead of buttons and I love them! With the giant belt loops on the back, I'll always wear the belt, so the button would be hidden anyway. I'll save the 3 I bought for another project.

The biggest flaws in the sewing are on the inside and it's pretty much a hot mess. Puckery princess seams, wonky hem, sleeve lining was too short,and I just added another band of lining.

And the lining is Hot! It's Pink! It says "Look at ME!" Oh well, again, I'll live. Most of the time, curious onlookers will only see a glimpse anyway.

And that's it! Curious about more of these posts?
Muslin #1
Muslin #2A
Muslin #2B
Cutting it out
Pad Stitching
The Interfacing

And I think that's it. How about some more pictures!


Wednesday, November 3, 2010

Interfacing for the Lady Grey

I have used 4 different kinds of interfacing for the Lady Grey, plus sleeve heads. And what are they? Well, 2 kinds of hair canvas. The one on the side piece is just regular hair canvas that I bought at G Street Fabrics in Maryland. Unfortunately, it was only half as wide as I thought it would be, and I didn't have enough. So for the front piece, I ordered what turned out to be Pro-Tailor Fusible Hair Canvas from Fashion Sewing Supply.
Well, I knew I was ordering the hair canvas, but the fusible part turned out to be the surprise part.

Never mind though, instructions came with the fusible hair canvas, and I just went with it. As you can see, the lower sleeve part has yet another interfacing, and this one is Pellon 860F Ultra-weft. Also fusible. Seems pretty good, and is loosely woven.

Do you see the cute pink polka dot pocket? Polyester charmeuse. The back stay is the regular hair canvas. And I'm not sure it shows up, but the back hem is interfaced with pro-sheer elegance fusible interfacing, which is a very lightweight knit interfacing. Seemed like a good idea. I'll let you know when I get to the hemming part.

And I used a sleeve head to support the sleeve cap and to help with the easing. The sleeves went in pretty easily with only one pucker that I had to fix.

And then on to the pad stitching for the collar. I had enough regular hair canvas, so used that. One of the problems I had with the collar was that as you stitch, the canvas can get pulled and bunched, and then doesn't go to the edges like it should. If you hold it with pins (which I did) you get repeatedly stuck. Ouch! My solution:

Tuesday, November 2, 2010

Don't Mess with Lady Grey!

Seriously! [editor's note: that is NOT Lady Grey in the picture, but clearly must be her protector!]

[Saturday, Kyle, Roland and I went skeet shooting. Beautiful fall weather, fun company and well, not much success on my part of hitting those orange flying saucer-like "skeets".  Never mind that, what about the sewing?!!]

It almost looks like a coat!


Sleeves will be added tomorrow! And the lining is all cut out. Looking back at Gertie's tutorials (click on the sidebar sew along icon to see them), there will be more pad stitching with the collar before the lining is tackled though. Check out a close up of the pad stitching on the lapel:


I've got lots more projects lined up to start right after the coat is finished (and maybe worked in even before it's finished). Some of them will be Christmas gifts, so they won't be revealed until later.

Wednesday, October 27, 2010

Basting and Knitting

The Lady Grey is slooooowwwly coming along. I've finally done some sewing on it. Hand sewing that is, and have done the permanent basting of the interfacing on the side front pieces. My fabric does not appear to be as forgiving as I had hoped. Take a look:
Should I redo it? The other piece, pictured with the basting up, is piece #2, and clearly benefitted from the practice. The picture, to be honest, looks pretty glaring, but in person, it doesn't look nearly as noticeable. It took watching the entire Princess and the Frog on netflix to baste just these 2 pieces.

Moving on. To knitting. I certainly don't need to add more crafty skills to my ability to procraftinate (a term coined by my sister). Yet a couple of weeks ago, I was in California with a group of Etsy friends (a trip that needs it's own post), and Melissa taught me to knit. Thanks, Melissa. Now, I appear to be hooked. I made a scarf:
It has a few issues, and I haven't woven in those beginning and end pieces. It has a tendency to roll and become skinnier, which isn't an altogether bad thing.
And, of course, it's always fun to see other ways to style your creations.

Monday, October 25, 2010

Buttonholes and the Excess

I quickly want to cover the buttonhole issue today. I had never made a bound buttonhole until Saturday, and I found, using Gertie's tutorial, that there is really nothing hard about them. The question then becomes, from a design standpoint, do I want to use them.

The practice buttonhole:
Technically speaking, I think it looks pretty good. The opening is maybe a little tall, but I'm just not thrilled with the look with the thicker wool. I made some other buttonholes:
I had to use the flash so you could get a better look. After looking at some of my RTW coats, they mostly had the keyhole version. I like the one using buttonhole twist thread to make a corded buttonhole. Bottom line though? I've decided to use those awesome giant snaps. I'll always be wearing the tie belt, and the button will be covered up anyway. And if I change my mind, I can go back and put in regular buttonholes.

One of the commenters on the previous post asked why I thought I had so much fabric left over. There are a couple of reasons. The first is simply that I bought too much fabric. According to the pattern, for a size 10, I would need 4-1/4 yards of 60" fabric. Gorgeous Fabrics sells in whole yards only, so I decided to err on the side of too much, and bought 5 yards.

Reason #2 has to do with the pattern itself. The range of yardages given for all the sizes goes from 4-1/8 to 4-1/3. That's not that big of a difference really, and clearly a size 0 will need less fabric than a size 18. In my experience, many pattern makers waste a lot of fabric with their layouts "just in case", and with careful positioning, a sewist can come up with a more efficient pattern layout herself.

Which brings me to reason #3. My mom was notorious for bringing home remnants from the fabric store she worked at, and making patterns fit on seemingly too little yardage. I seemed to have picked up on that ability, and can "squish" a pattern onto the fabric, managing to waste as little as  possible. I did make some alterations, but none that really would have affected the yardage significantly.

Basically, I like to use the given pattern layouts as a suggestion, and as a way to make sure I've cut out all the necessary pieces, checking them off as I go. I do make sure to follow grainlines, and nap if there is any, as well, which is important for a successful project.

Ironically, I thought I had enough hair canvas, and have had to order some more. It will arrive in a couple of days. Oops.

Saturday, October 23, 2010

Finally Up -- Lady Grey

Well, I am so far behind with the Lady Grey Sew Along that I'm not so much sewing along with, as just lollygagging way behind the pack. Never mind though, I have finally got it cut out! Evidence:
Instead of using my studio cutting table, I really wanted to spread out. And I'm a squisher. As in, I like to squish the pattern pieces up to have as little fabric waste as possible. And as a result, I have almost 2 yards left over. Enough to make a great skirt (or two). You can see it uncut bit draped over the chair toward the window.

One of the reasons I wanted to do this particular sew along, is the high caliber of Gertie's tailoring tutorials. I've never really done any tailoring, and this is a great opportunity for some free lessons. But I'm clearly way behind on her blog posts. My solution... I'm going to make my own book of Gertie's Tailoring Tips. The first four "chapters":


I'm using both sides of the paper, printing the odd numbered pages, reinserting the paper into my printer, and then printing the even numbers. In an effort to save some trees, I'm not printing all the comments, but if I have any problems with any of the techniques, I'll be sure to go back and review the comment section, too. And of course, you can't "read" the videos, so I'll have to go back and watch those.

First up is the bound buttonholes, and I've made my practice one. More on that tomorrow.

Tuesday, September 28, 2010

Ready to Cut

The tinkering is finished, and the cutting is about to commence! I did a final version in the fleece, taking a wedge out of the front sort of a la Patty the Snug Bug, and I also needed to take an inch out of the side front piece above the waist to accommodate my short waistedness that I was trying to ignore. I was also trying to ignore my narrow shoulders, but also ended up narrowing it at both the front and back and will still use the shoulder pads to make it hang more nicely.

It looks a bit like Frankenstein's monster, but that's not so evident in the pictures. And the back is hemmed and front isn't. C'est la vie. Today's goal is to simply prepare the pattern pieces, making sure I have all the markings on them. Another option is to take it all apart and use the actual "muslin" as your pattern, but this fleece tends to do some weird stretchy things, and I'm not really comfortable doing that, so paper it is. Plus, have you ever tried to write on fleece? Not easy.

Gertie has laid out a very doable schedule for the making of this coat, and that will also allow me to get a couple of other things made that have been either in the queue or floating around in my head for at least a couple of weeks now.

Saturday, September 25, 2010

Lady Grey "It's SO FLUFFY" Coat

Let's just get this out of the way:


I've made my second muslin and this time I used fleece which is closer in weight to the wool that I've chosen. So, what changes did I make? Here ya go:

First, please ignore the wonky hem. I lengthened the pattern, and then turned up the hem, just to get an idea. I like the length. I shortened the sleeves. Are they too short now? That's an easy fix.

I made the lapels and collar slightly smaller. I think I like this better. And I deepened the armscye 3/4". That seems like a lot, but it feels so much better, and will allow those winter clothes that eventually we may need. (The ceiling fan AND another fan, plus the AC, are going for this photo shoot!)

I stuck with the size 10, but graded out to a 12 at the waist on all the seams and then back to the 10. Then, when I stitched the princess seams, about 2-3" above and below the waist, I used a 1/2" seam allowance, then back to the 5/8". I don't think that will be necessary at all on the front and will stick with 5/8" SA all the way.

Now for the back view:
I think I will keep the 1/2" SA on the princess seams for the back. It's a bit wrinkled looking, but that is really from the belt. Take a look without the belt:
The back is much better, and I think with a lining, many of those wrinkles will not be in evidence.

The thing I'm most concerned about on the back is how the shoulders look kind of droopy, and it generally seems a bit too wide. I'm wearing sweater underneath, and it's plenty comfy, so I think I can do a bit of narrowing at about the halfway mark on the armhole on up to the shoulder on the back and the front. No more than 1/2" narrower. I'll unstitch and try again and see what happens.

I'm feeling pretty good about this version, and it will come in handy as a bathrobe, I think. Or not.

Friday, September 24, 2010

Award Time -- 10 Things About Me

The blogging awards are making their rounds, and earlier this week, Julia presented me with the Beautiful Blogger Award. Thanks so much, Julia! The rules are to post 10 things that you don't know about me, and to pass it on to more bloggers. First, on the passing it on... lots of the sewing bloggers that I read have already gotten this award, so I'm going to branch out, and pass it on to the Etsy group that I'm a part of, The Daily Sweets, and to those girls that have blogs.


Now, on with the 10 things:

  1. Julia (yes, the one that gave me the award) and I are practically related! Let's see. My daughter, Laura, married Thomas who is from Julia's hometown, and Julia is married to Thomas' aunt's cousin. Or something like that. We've met once, but a proper meeting, where we both know who we're actually meeting, and not realizing it later is definitely in order!
  2. I've been in the Etsy group I mentioned, The Daily Sweets,  for about 2-1/2 years now, and several of us are meeting up for the first time next month in California! I can't wait!
  3. I'm addicted to certain reality TV shows, especially the kinds that have competitions. Project Runway, the Amazing Race, and So You Think You Can Dance are my favorites.
  4. OK, so I'm also addicted to other TV shows, but I rarely turn the TV on until later in the afternoon, and then it's CNN.
  5. I like it completely quiet when I'm sewing, but occasionally will turn on some music, or CNN, when I want a little "company."
  6. I really like hot weather, and am secretly thrilled that it still feels like summer outside.
  7. I don't like to go fast, as in when you ride a jet ski, or ski downhill, much to my children's dismay.
  8. There are no teenagers in my house anymore. Both my kids are now in their 20s.
  9. I recently killed my son's pet fish. Who knew that betas really thrived on neglect?
  10. I love growing avocado trees, starting them from seeds, though I have only done it once successfully. I do have another seed trying to get started now though.
**************************************************

If you've made it this far, how about a Lady Grey update? I've decided to make another muslin from the changes on the first one, and I'm retracing the pattern with the changes, and I'm going to use fleece, which feels way more like the thickness of my wool than the muslin does. Pictures tomorrow (hopefully).

Thursday, September 16, 2010

My Lady Grey Lab Coat

Oh! That's not what we're making? Well, darn, must go back and read the instructions.

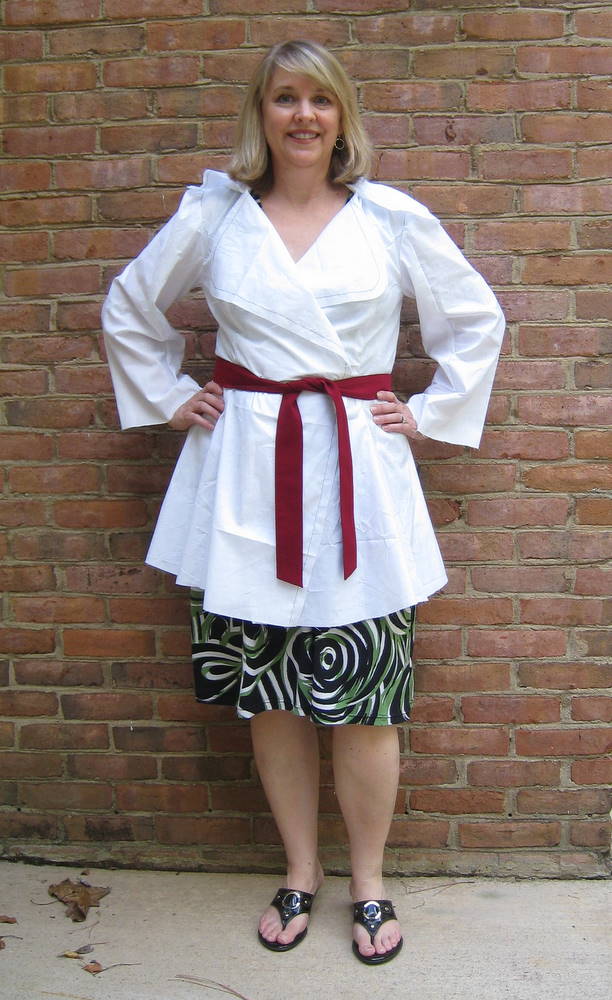
Ah, yes, it's just muslin time, and so, what did I do? First I measured across the shoulders of my current favorite coat, and chose the size based on that, and went with a 10. I realize that I don't appear to be a 10, and that none of my other measurements match up to that, but never mind, I didn't make any changes (yet) and just cut out a straight 10. (The snazzy red belt belongs to my trenchcoat.) Here's the result:
So, on first glance, the collar over my right shoulder is crumpled up. And do you see that leaf on the ground? That doesn't mean fall right now... it was 92 degrees F when I took this picture. So I'm wearing a sleeveless dress. Yep, the Lady Grey fits me great! As a blouse! Look at the back:
Hmmm, I'm leaning just a bit. See that big ol' wrinkle across the middle of my back? That will have to go.

I don't know if you can see it, but the dark line on the lapel is the seam line. I'm still on the fence about narrowing the lapels and collar just a bit, but I kind of like how the width of the collar/lapel balances out the width of the hips. Covers up my narrow shoulders in other words.

So, a few changes to be made:
  • the excess on the back.
  • the super long sleeves. What's up with the sleeve length? And is it just me, but I couldn't find in the instructions how deep the hem was on the sleeve or the coat itself. I tend to be a skimmer though.
  • I actually like the length of the coat. I think that length makes the peplum hit at a more flattering place on my body, so will make that my finished length and add the hem depth to the pattern.
  • I think I'm going to go with 1" seam allowances on the body and give myself some extra room for actual winter clothes to fit underneath. My wool is a medium weight, so I'm a little concerned about how that's all going to fit and plan to baste the seams first for fit when I hit the actual fabric.
  • add a bit of extra depth the armscyes for those winter clothes that I mentioned above. I don't plan to interline because I live in Atlanta after all, and it just doesn't get that cold. And if it happened to have a day or three where it was that cold, this is not the coat I'd be wearing.
So, what do you think? Am I delusional? I know there's some discussion on whether or not this coat works for everyone (uh, no), but I'm kind of liking it on me.

Wednesday, September 15, 2010

The Future Lady Grey

The Blog for Better Sewing (you know, Gertie's blog) Lady Grey Sew Along is underway! I've accomplished a few things, besides deciding to participate, and the first thing I want to share is my fabric. After deliberating on color, I settled on a medium weight almost black navy wool from Gorgeous Fabrics and a polyester charmeuse hot pink with white polka dots from Gail K's Fabrics in Atlanta. Oh, and I got my buttons at Gail K's too. I got one dressy button, and one plain flat navy blue one for the inside if you're wondering why there's only one button in the picture. I'm not 100% decided on the button, but have yet to look through my stash yet.

There you go. On my monitor, it really does look black. I'm slightly ahead of the sew along, as I've finished my muslin, at least version #1, and I'll reveal that tomorrow. I'm pretty excited though!

Oh, I almost forgot... I took the wool to my local dry cleaners to be steam pressed. And then when I got home I was reading the comments on Gertie's blog and saw the one from Ann at Gorgeous Fabrics mentioning an at home shrinking method. Arghhhh! Oh, well, next time.

LinkWithin

Related Posts with Thumbnails