Well, who knew it was going to be such an adjustment to working full-time? My hat is off to all sewing bloggers who hold down a full-time job and manage to also be prolific sewists! I'm exhausted after working 8 hours, and on my days off (which are not the weekend, but mid-week) I'm catching up on everything else but sewing. Like sleep, laundry, grocery shopping, ... you get the idea. Now that Roland is the stay at home spouse, we're in negotiations for a new division of duties, though, so fingers crossed that will all go smoothly. I think with a little hand holding, he'll even figure out what you do in a kitchen. And, truthfully, probably be even better at cooking than I am (which is a low bar, by the way).
With that out of the way, do you remember the saga of my new kitchen window seats? Way back when, the project stalled after I had made their muslin covers. There was fabric to choose, blah, blah, blah. I'm happy to report that I have one of them covered! And have started on the other, with kind of a plan to make 3 cushions into one. We'll see if it works. And the fabric? Nothing that I showed you at all. You see, with the window seat being primarily a dog perch, we decided on a faux leather from fabric.com that can just be wiped off. Voila!
Excuse the bad photo. It's kind of a coppery color, and really looks good with the painting on the wall (which you can't see). We're still waiting for the table to be delivered, so, well, that's all I have to say about that.
I've got some black knit from my stash ready to be whipped up into a renfrew, and though I have probably lost my mind, I'm going to attempt to do the Thurlow sew along hosted by Lauren of Lladybird fame. Click on the badge in the sidebar and you'll go right to the details. This will be a good excuse to get a great pair of trousers. I'm sorry to say that they will be ... black. As will a couple skirts I have in the queue. Do not come here for gorgeous prints. Well, at least not at the moment.
Oh, almost forgot! The lovely Denise at the Blue Gardenia featured me recently (well, back in September) in her "sew to dress" feature, along with an adorable McCall's pattern, perfect for my new shop girl persona. Please go take a look if you missed it previously.
I've missed my sewing and blogging friends, and will attempt to post now and then, but trust that I haven't dropped off the face of the earth, but am simply to tired to even type. And if you need a bridesmaid dress or mother of the bride dress and, the horrors, aren't making it yourself (hee hee), drop in and see me at Bridals by Lori in Sandy Springs, Georgia. Yes, it's the bridal salon in Say Yes to the Dress: Atlanta. I'm not on TV, though, so don't get all excited. Should that happen, believe me, I'll let y'all know!!
Also, I'm still reading your blogs... just can't comment as often because sometimes its just a quick read on my phone. Trust me, you all rock at all your projects!!
Thread runs through my life, holding it together. What keeps yours from falling apart?
Showing posts with label renovation. Show all posts
Wednesday, October 3, 2012
Catching Up
Labels:
Bridals by Lori,
kitchen,
renovation,
sew along,
sewaholic,
Thurlow,
window seat
Monday, August 20, 2012
Sunday, August 19, 2012
Go Big or Go Home
Well, I have been a temporarily MIA blogger, but it hasn't really been that long. There just is so much swirling around in my head lately, that I seemingly have been incapable of putting words together in a line. I'll even let you in on some of the swirliness soon, but in little bits as they come to the surface in a reportable way.
One thing that I CAN share though, is the kitchen! It's done!! And while it was roughly 4 times more expensive than we had originally budgeted, we decided that, well, putting pretty over a crappy kitchen design just did not seem very appealing. So, we "went big". The finishing touches (i.e., kitchen table, chairs, rug) are still at their respective stores, waiting to be found and purchased, but the intrusive, strange people constantly in my house part, is done. And I'm ready to share! Roland has even done a video of stills, and set it to music, and so, sit back... and enjoy...
Labels:
kitchen,
renovation
Monday, August 6, 2012
Window Seat, Part 4
Let's see, where did I leave off? Oh, yes, fabric choice. No choices have been made yet. That's how we roll here. Well, that's not entirely true. We've decided that probably, for the rug under the table, we'll just get a solid color remnant and have it bound. I think Georgia is the carpet capital of the USA and there are lots of places with remnants (or so I assume). We have purchased from one place in particular, so we just need to get our little selves down there. Rug? Well, the rug needs to go with the window seat.
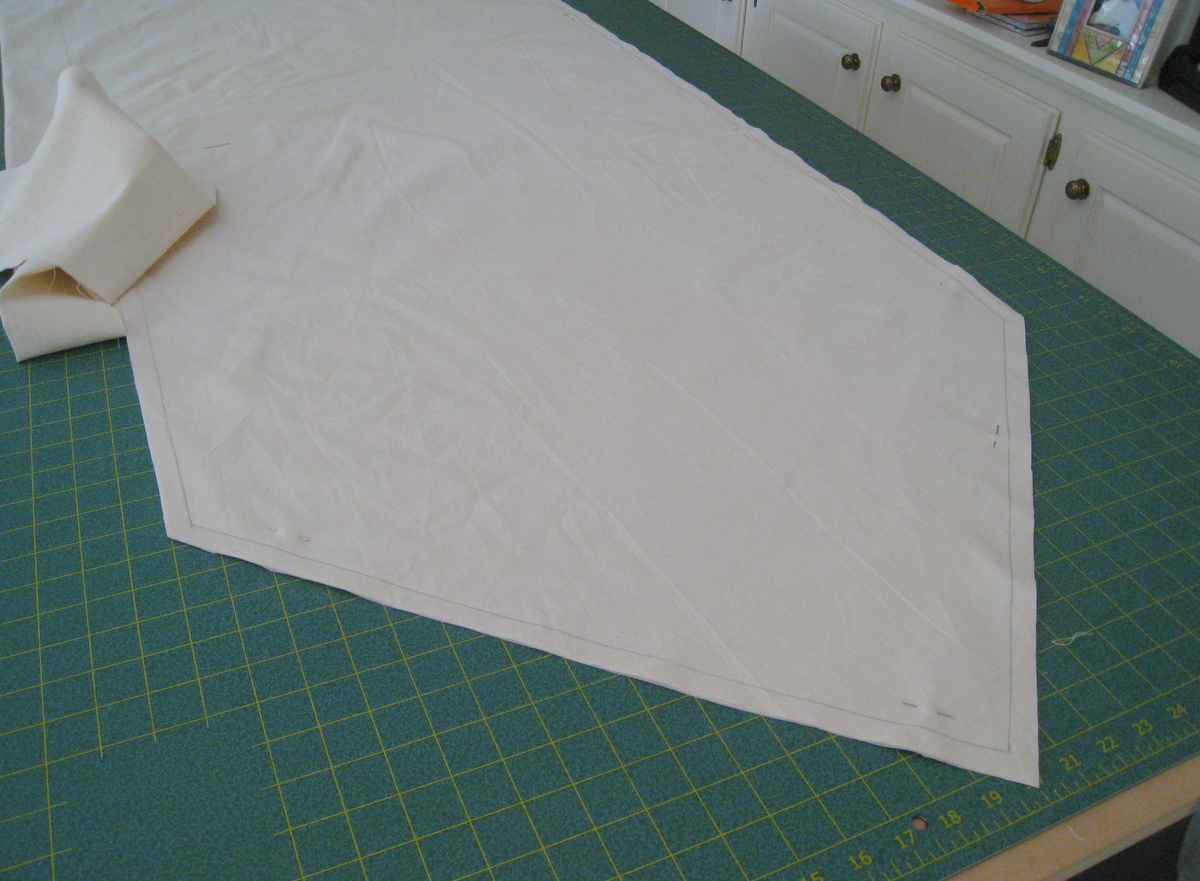
In the meantime, there is work to be done anyway. If you've ever worked with this kind of foam, you know it is very grabby, so putting the covers on can be frustrating at best. To solve that, I'm making a muslin cover for each cushion that will more or less be permanent. The outer decorative cover will have a zipper so that it can be removed for washing. The muslin cover will not. It also won't be all that pretty. But it is easy to make.
I abandoned the newpaper "patterns" and just took each actual cushion to use as a template of sorts. I traced around the perimeter, added a 1/2" seam allowance and cut it out. Oh, doubled of course, since there are 2 sides.
Rinse and repeat, 3 more times for the 3 additional cushions. There are also "sides" which are 4" wide. I added up each perimeter length, and then cut strips that are 5" wide. Well, mostly I ripped, though I did cut random lengths from the scraps produced from cutting out the tops and bottoms. And that's it.
In other kitchen news, I'm still getting the odd (and by odd, I mean random) comment about the single/double sink poll, and I suppose I should let you in on the decision.
We went double. With a low saddle (which is the technical term for the middle divider). That's our actual sink. It's made from sil-granite which is 90% granite dust and 10% some kind of polymer. And that's our actual granite countertop. The faucet, etc has been installed, but I don't have a picture of that yet, because they quickly wrapped it in plastic for protection. We're to the painting stage now, so it won't be long now!!
In the meantime, there is work to be done anyway. If you've ever worked with this kind of foam, you know it is very grabby, so putting the covers on can be frustrating at best. To solve that, I'm making a muslin cover for each cushion that will more or less be permanent. The outer decorative cover will have a zipper so that it can be removed for washing. The muslin cover will not. It also won't be all that pretty. But it is easy to make.
I abandoned the newpaper "patterns" and just took each actual cushion to use as a template of sorts. I traced around the perimeter, added a 1/2" seam allowance and cut it out. Oh, doubled of course, since there are 2 sides.
Rinse and repeat, 3 more times for the 3 additional cushions. There are also "sides" which are 4" wide. I added up each perimeter length, and then cut strips that are 5" wide. Well, mostly I ripped, though I did cut random lengths from the scraps produced from cutting out the tops and bottoms. And that's it.
In other kitchen news, I'm still getting the odd (and by odd, I mean random) comment about the single/double sink poll, and I suppose I should let you in on the decision.
We went double. With a low saddle (which is the technical term for the middle divider). That's our actual sink. It's made from sil-granite which is 90% granite dust and 10% some kind of polymer. And that's our actual granite countertop. The faucet, etc has been installed, but I don't have a picture of that yet, because they quickly wrapped it in plastic for protection. We're to the painting stage now, so it won't be long now!!
Labels:
home decor,
kitchen,
muslin,
renovation,
sink,
window seat
Tuesday, July 31, 2012
Window Seat, Part 3
Let's talk fabric, shall we? There are a bazillion fabric sources for home dec fabric, both online, and, here in Atlanta, in real actual stores. I guess people change their curtains a lot here. Who knows. I've probably been to the majority of them, since our house came with, well, no curtains at all. Sure, blinds galore... no privacy was compromised...but no curtains, drapes, valances, well, you get the picture. So I made some. Lots in fact. For almost every room in our house, until I completely burned out.
Wait. Aren't we talking about the window seat fabric? So, in light of all the sources, and the fact that I just didn't have the energy to schlep around in the heat, and also, I didn't feel like clicking and comparing, I turned to my favorite online source, fabric.com. One of the great things about this place, is that you can purchase swatches, and it was totally worth it to pay 75 cents to $1.75 for 16 swatches. Oh, and they're a generous 8" x 8"! I'm not going to show you all 16, but here's what we've narrowed it down to.
We're thinking of using 2 different fabrics, one for the center section, and a solid that will frame that section and go up against the window. Set #1:
Sophisticated and pretty.
Set #2:
Abstract and fun. That last fabric would end up as a throw pillow. Also, the solid gray would work here to.
Not sure if you can see the labels in the pictures, but all of them, except the black with circles, are recommended to be dry cleaned. Pshaw! We have 2 dogs, and they will undoubtedly be lounging on the window seat, gazing out the window and their nemesis, the squirrel. These covers will need to be washed!
Never fear though. Of course I threw them all into the washing machine and gave them a spin. And they all came out looking great! Especially the solid ones. No shrinkage. The swatch with the flowers frayed quite a bit, but a serger will take care of that.
We're still debating, so feel free to chime in with the set you like the best with a nonbinding vote. Once we choose, I'll need to order both the fabric and some upholstery zippers, but there's another important step that I'll tell you about in a day or 2.
Stay tuned!
Wait. Aren't we talking about the window seat fabric? So, in light of all the sources, and the fact that I just didn't have the energy to schlep around in the heat, and also, I didn't feel like clicking and comparing, I turned to my favorite online source, fabric.com. One of the great things about this place, is that you can purchase swatches, and it was totally worth it to pay 75 cents to $1.75 for 16 swatches. Oh, and they're a generous 8" x 8"! I'm not going to show you all 16, but here's what we've narrowed it down to.
We're thinking of using 2 different fabrics, one for the center section, and a solid that will frame that section and go up against the window. Set #1:
Sophisticated and pretty.
Set #2:
Abstract and fun. That last fabric would end up as a throw pillow. Also, the solid gray would work here to.
Not sure if you can see the labels in the pictures, but all of them, except the black with circles, are recommended to be dry cleaned. Pshaw! We have 2 dogs, and they will undoubtedly be lounging on the window seat, gazing out the window and their nemesis, the squirrel. These covers will need to be washed!
Never fear though. Of course I threw them all into the washing machine and gave them a spin. And they all came out looking great! Especially the solid ones. No shrinkage. The swatch with the flowers frayed quite a bit, but a serger will take care of that.
We're still debating, so feel free to chime in with the set you like the best with a nonbinding vote. Once we choose, I'll need to order both the fabric and some upholstery zippers, but there's another important step that I'll tell you about in a day or 2.
Stay tuned!
Labels:
home decor,
kitchen,
renovation,
window seat
Sunday, July 29, 2012
Window Seat, Part II
This window seat is a multi-step project, and I've decided to show you step by step what I'm doing, rather than just a big reveal. There is even a video today for your enjoyment. Not sure how much information I'm actually imparting, but you can see what I sound like.
Anyway, recapping, so far I've bought the foam and made the pattern. The next thing to do is to cut the foam into the shapes that I need. Remember that my window seat is fitting into the bay window and that's giving mefits the opportunity to make 4 cushions to fit onto the platform, kind of like a puzzle. Here are 2 of the 4 positioned onto their designated foam piece.
By the way, I'm doing this project in the kitchen reno area, basically to keep as much dog hair away from the foam as possible. It's like a magnet for the fur!
I traced around each pattern piece. Note that I also marked the perpendicular line on the side to help guide the knife. OK. Are you ready? I've made a video! This has taken me literally hours to make and then figure out how to add the little title slides at the beginning and the end (which really just flash the info at you). Clearly, I have room for improvement for my movie making skills.
Whew! The electric knife really does make the project so much easier. After I finished cutting all 4 pieces, I did have to make some adjustments to make it fit just so onto the window seat.
Next up: Fabric selection.
Anyway, recapping, so far I've bought the foam and made the pattern. The next thing to do is to cut the foam into the shapes that I need. Remember that my window seat is fitting into the bay window and that's giving me
By the way, I'm doing this project in the kitchen reno area, basically to keep as much dog hair away from the foam as possible. It's like a magnet for the fur!
I traced around each pattern piece. Note that I also marked the perpendicular line on the side to help guide the knife. OK. Are you ready? I've made a video! This has taken me literally hours to make and then figure out how to add the little title slides at the beginning and the end (which really just flash the info at you). Clearly, I have room for improvement for my movie making skills.
Next up: Fabric selection.
Labels:
home decor,
kitchen,
prep work,
redecorating,
renovation,
work in progress
Monday, May 21, 2012
The Kitchen Project: Officially Starting
Well, friends, I know this is mostly a sewing blog, but I have been totally preoccupied with the Kitchen Project. I'm still doing Me Made May, though Saturday, I bailed on the picture of me. Wore my purple yoga skirt, for what it's worth. I basically spent the weekend moving everything out of the kitchen, down to the basement kitchen (which yes, I am really grateful to have... still). I had been working on the packing up, little by little, but the drop dead everything had to be out of the kitchen date was today. The final drawer, the biggest desk drawer filled with pencils, pens, and assorted other random flotsam, was unceremoniously dumped into a grocery bag.
Enough with the talk though, let's see some before pictures.
This kitchen is basically being gutted and we're starting over. One of the changes I'm most excited about is the removal of that awkward pole. I will update as appropriate, and I've got a "Kitchen Project" set of pictures that I'll be adding to on flickr. I'm happy to answer any questions about this, too. If you ask them in the comments, I can reply in the comments, so please check back for the answer. Also, if there's anything you'd like me to write a post about concerning the whole remodeling process, leave me a comment for that, too.
And never fear, there is some sewing as I have some really cute (I hope) shorts that I've almost finished. Maybe tomorrow.
Enough with the talk though, let's see some before pictures.
| Breakfast nook (view from the great room) |
| view from breakfast nook |
| Laundry Room |
| view from Laundry Room/Garage entry |
| view from the dining room |
| Breakfast Nook (view from the kitchen) |
And never fear, there is some sewing as I have some really cute (I hope) shorts that I've almost finished. Maybe tomorrow.
Labels:
kitchen,
renovation
Subscribe to:
Posts (Atom)
.jpg)