One thing that I CAN share though, is the kitchen! It's done!! And while it was roughly 4 times more expensive than we had originally budgeted, we decided that, well, putting pretty over a crappy kitchen design just did not seem very appealing. So, we "went big". The finishing touches (i.e., kitchen table, chairs, rug) are still at their respective stores, waiting to be found and purchased, but the intrusive, strange people constantly in my house part, is done. And I'm ready to share! Roland has even done a video of stills, and set it to music, and so, sit back... and enjoy...
Sunday, August 19, 2012
Go Big or Go Home
Well, I have been a temporarily MIA blogger, but it hasn't really been that long. There just is so much swirling around in my head lately, that I seemingly have been incapable of putting words together in a line. I'll even let you in on some of the swirliness soon, but in little bits as they come to the surface in a reportable way.
One thing that I CAN share though, is the kitchen! It's done!! And while it was roughly 4 times more expensive than we had originally budgeted, we decided that, well, putting pretty over a crappy kitchen design just did not seem very appealing. So, we "went big". The finishing touches (i.e., kitchen table, chairs, rug) are still at their respective stores, waiting to be found and purchased, but the intrusive, strange people constantly in my house part, is done. And I'm ready to share! Roland has even done a video of stills, and set it to music, and so, sit back... and enjoy...
One thing that I CAN share though, is the kitchen! It's done!! And while it was roughly 4 times more expensive than we had originally budgeted, we decided that, well, putting pretty over a crappy kitchen design just did not seem very appealing. So, we "went big". The finishing touches (i.e., kitchen table, chairs, rug) are still at their respective stores, waiting to be found and purchased, but the intrusive, strange people constantly in my house part, is done. And I'm ready to share! Roland has even done a video of stills, and set it to music, and so, sit back... and enjoy...
Monday, August 6, 2012
Window Seat, Part 4
Let's see, where did I leave off? Oh, yes, fabric choice. No choices have been made yet. That's how we roll here. Well, that's not entirely true. We've decided that probably, for the rug under the table, we'll just get a solid color remnant and have it bound. I think Georgia is the carpet capital of the USA and there are lots of places with remnants (or so I assume). We have purchased from one place in particular, so we just need to get our little selves down there. Rug? Well, the rug needs to go with the window seat.
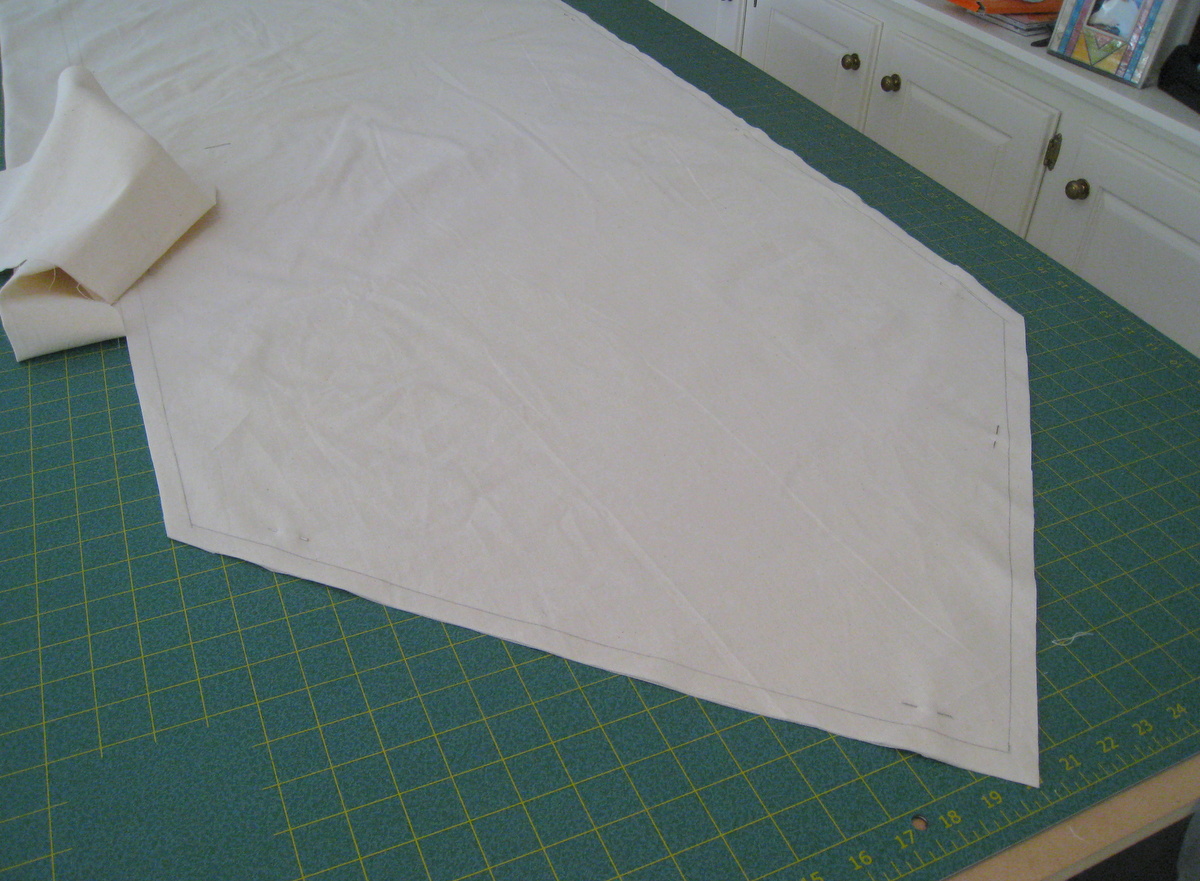
In the meantime, there is work to be done anyway. If you've ever worked with this kind of foam, you know it is very grabby, so putting the covers on can be frustrating at best. To solve that, I'm making a muslin cover for each cushion that will more or less be permanent. The outer decorative cover will have a zipper so that it can be removed for washing. The muslin cover will not. It also won't be all that pretty. But it is easy to make.
 I abandoned the newpaper "patterns" and just took each actual cushion to use as a template of sorts. I traced around the perimeter, added a 1/2" seam allowance and cut it out. Oh, doubled of course, since there are 2 sides.
 Rinse and repeat, 3 more times for the 3 additional cushions. There are also "sides" which are 4" wide. I added up each perimeter length, and then cut strips that are 5" wide. Well, mostly I ripped, though I did cut random lengths from the scraps produced from cutting out the tops and bottoms. And that's it.
In other kitchen news, I'm still getting the odd (and by odd, I mean random) comment about the single/double sink poll, and I suppose I should let you in on the decision.
 We went double. With a low saddle (which is the technical term for the middle divider). That's our actual sink. It's made from sil-granite which is 90% granite dust and 10% some kind of polymer. And that's our actual granite countertop. The faucet, etc has been installed, but I don't have a picture of that yet, because they quickly wrapped it in plastic for protection. We're to the painting stage now, so it won't be long now!!
In the meantime, there is work to be done anyway. If you've ever worked with this kind of foam, you know it is very grabby, so putting the covers on can be frustrating at best. To solve that, I'm making a muslin cover for each cushion that will more or less be permanent. The outer decorative cover will have a zipper so that it can be removed for washing. The muslin cover will not. It also won't be all that pretty. But it is easy to make.

In other kitchen news, I'm still getting the odd (and by odd, I mean random) comment about the single/double sink poll, and I suppose I should let you in on the decision.

Wednesday, August 1, 2012
How Do You Pinterest?
Is Pinterest even a verb? Anyway, I'm curious about your pinterest habits, and have concocted a quick poll about pinterest. No prizes, I'm just curious. I'll tell you how I Pinterest in another post.
Answer all that apply! And feel free to elaborate in the comments.
Answer all that apply! And feel free to elaborate in the comments.
Tuesday, July 31, 2012
Window Seat, Part 3
Let's talk fabric, shall we? There are a bazillion fabric sources for home dec fabric, both online, and, here in Atlanta, in real actual stores. I guess people change their curtains a lot here. Who knows. I've probably been to the majority of them, since our house came with, well, no curtains at all. Sure, blinds galore... no privacy was compromised...but no curtains, drapes, valances, well, you get the picture. So I made some. Lots in fact. For almost every room in our house, until I completely burned out.
Wait. Aren't we talking about the window seat fabric? So, in light of all the sources, and the fact that I just didn't have the energy to schlep around in the heat, and also, I didn't feel like clicking and comparing, I turned to my favorite online source, fabric.com. One of the great things about this place, is that you can purchase swatches, and it was totally worth it to pay 75 cents to $1.75 for 16 swatches. Oh, and they're a generous 8" x 8"! I'm not going to show you all 16, but here's what we've narrowed it down to.
We're thinking of using 2 different fabrics, one for the center section, and a solid that will frame that section and go up against the window. Set #1:

 Sophisticated and pretty.
Set #2:


 Abstract and fun. That last fabric would end up as a throw pillow. Also, the solid gray would work here to.
Not sure if you can see the labels in the pictures, but all of them, except the black with circles, are recommended to be dry cleaned. Pshaw! We have 2 dogs, and they will undoubtedly be lounging on the window seat, gazing out the window and their nemesis, the squirrel. These covers will need to be washed!
Never fear though. Of course I threw them all into the washing machine and gave them a spin. And they all came out looking great! Especially the solid ones. No shrinkage. The swatch with the flowers frayed quite a bit, but a serger will take care of that.
We're still debating, so feel free to chime in with the set you like the best with a nonbinding vote. Once we choose, I'll need to order both the fabric and some upholstery zippers, but there's another important step that I'll tell you about in a day or 2.
Stay tuned!
Wait. Aren't we talking about the window seat fabric? So, in light of all the sources, and the fact that I just didn't have the energy to schlep around in the heat, and also, I didn't feel like clicking and comparing, I turned to my favorite online source, fabric.com. One of the great things about this place, is that you can purchase swatches, and it was totally worth it to pay 75 cents to $1.75 for 16 swatches. Oh, and they're a generous 8" x 8"! I'm not going to show you all 16, but here's what we've narrowed it down to.
We're thinking of using 2 different fabrics, one for the center section, and a solid that will frame that section and go up against the window. Set #1:


Set #2:


Not sure if you can see the labels in the pictures, but all of them, except the black with circles, are recommended to be dry cleaned. Pshaw! We have 2 dogs, and they will undoubtedly be lounging on the window seat, gazing out the window and their nemesis, the squirrel. These covers will need to be washed!
Never fear though. Of course I threw them all into the washing machine and gave them a spin. And they all came out looking great! Especially the solid ones. No shrinkage. The swatch with the flowers frayed quite a bit, but a serger will take care of that.
We're still debating, so feel free to chime in with the set you like the best with a nonbinding vote. Once we choose, I'll need to order both the fabric and some upholstery zippers, but there's another important step that I'll tell you about in a day or 2.
Stay tuned!
Sunday, July 29, 2012
Window Seat, Part II
This window seat is a multi-step project, and I've decided to show you step by step what I'm doing, rather than just a big reveal. There is even a video today for your enjoyment. Not sure how much information I'm actually imparting, but you can see what I sound like.
Anyway, recapping, so far I've bought the foam and made the pattern. The next thing to do is to cut the foam into the shapes that I need. Remember that my window seat is fitting into the bay window and that's giving mefits the opportunity to make 4 cushions to fit onto the platform, kind of like a puzzle. Here are 2 of the 4 positioned onto their designated foam piece.
 By the way, I'm doing this project in the kitchen reno area, basically to keep as much dog hair away from the foam as possible. It's like a magnet for the fur!
 I traced around each pattern piece. Note that I also marked the perpendicular line on the side to help guide the knife. OK. Are you ready? I've made a video! This has taken me literally hours to make and then figure out how to add the little title slides at the beginning and the end (which really just flash the info at you). Clearly, I have room for improvement for my movie making skills.
Whew! The electric knife really does make the project so much easier. After I finished cutting all 4 pieces, I did have to make some adjustments to make it fit just so onto the window seat.

Next up: Fabric selection.
Anyway, recapping, so far I've bought the foam and made the pattern. The next thing to do is to cut the foam into the shapes that I need. Remember that my window seat is fitting into the bay window and that's giving me


Next up: Fabric selection.
Thursday, July 26, 2012
Window Seat, Part I
Sewing is going to happen again, but I've been a little overwhelmed this summer with a number of things and probably #1 of those things is the kitchen renovation. It was started in mid-May, and here we are, almost to August, and it's still not finished. Cabinets, countertops and the sink faucet are in, as well as the new floor (which happened before all those other things).
One of the fun details we decided to add was a window seat for the bay window. It has turned out to be kind of an odd shape because of the depth of the window and the width. We wanted it to be useful for seating at the table, and since you need to be closer to the table while you eat, it's bumped out a bit in the middle.
I'm going to make the window seat, but it's definitely a bit of a challenge due to the shape. In spite of the odd shape, I do want to say that home dec sewing is some of the easiest you can do, perfect for beginning sewists. Basically, if you can sew a straight seam, and do a little math, you can decorate your home with better fabrics and at a considerable cost savings.
Oh, and there is no fitting (well, on a body anyway)!
Let's get started!
Step 1 is decide on the thickness of the cushion. We're going with 4" thick which gives it a nice expensive and custom look. I've purchased upholstery foam at Joann's before, but with the odd widths, I hit the interwebs, and ultimately found the best deal at OnlineFabricStore.net. Have y'all heard of that shop? It's new to me, but it seems to be chock full of home dec supplies.
I ordered 2 pieces of foam: 24" x 108" and 30" x 54". There's a method to this madness, but look how it arrived:
 Quite compressed! That's just one piece, as I had the epiphany to record this process after the first one was unwrapped. Annndddd unwrapped:
 These are going to need to be cut into shapes. Yes, shapes. Apparently the easiest way to do the cutting is with an electric knife, so that was ordered and has also arrived. I'm going to start with covering the cushions with muslin because it will make the fashion fabric slide on much easier. More on that in another post. Let's not get ahead of ourselves!
Remember I mentioned odd shape. I need to make a pattern, so armed with newspaper and tape, that's what I did today.
 There will be 4 cushions total. The center front will be pointed on both ends and 24" wide. If you can see the rulers in the picture, that's kind of the outline. There will be a rectangular cushion center back against the center window. Then in front of each smaller window on the side will be a cushion that is kind of an odd shape.
That's enough for today. Mr. Sewing Life is not quite sold on the shape of the 4 cushions, so he'll be signing off on this first. Really, there's not a lot of choice.
Next up: the cutting of the foam. Maybe maybe I'll try to get a video of that happening.
One of the fun details we decided to add was a window seat for the bay window. It has turned out to be kind of an odd shape because of the depth of the window and the width. We wanted it to be useful for seating at the table, and since you need to be closer to the table while you eat, it's bumped out a bit in the middle.
I'm going to make the window seat, but it's definitely a bit of a challenge due to the shape. In spite of the odd shape, I do want to say that home dec sewing is some of the easiest you can do, perfect for beginning sewists. Basically, if you can sew a straight seam, and do a little math, you can decorate your home with better fabrics and at a considerable cost savings.
Oh, and there is no fitting (well, on a body anyway)!
Let's get started!
Step 1 is decide on the thickness of the cushion. We're going with 4" thick which gives it a nice expensive and custom look. I've purchased upholstery foam at Joann's before, but with the odd widths, I hit the interwebs, and ultimately found the best deal at OnlineFabricStore.net. Have y'all heard of that shop? It's new to me, but it seems to be chock full of home dec supplies.
I ordered 2 pieces of foam: 24" x 108" and 30" x 54". There's a method to this madness, but look how it arrived:


Remember I mentioned odd shape. I need to make a pattern, so armed with newspaper and tape, that's what I did today.

That's enough for today. Mr. Sewing Life is not quite sold on the shape of the 4 cushions, so he'll be signing off on this first. Really, there's not a lot of choice.
Next up: the cutting of the foam. Maybe maybe I'll try to get a video of that happening.
Wednesday, July 18, 2012
Fun With Mod Podge, Part I
Why did I not know about this stuff before? Well, I knew about it, but I didn't KNOW how great it could be.
Let's back up though. Are you on Pinterest? Do you pin and pin, or repin and repin, never to look at your boards again? Do you say, "oooh, how cool" or "I'm going to make that tomorrow" and then never do? Well, I've got a DIY board, and I'm going to attempt to actually make some of the things that I pin. Are you ready for this? It may or may not be sewing, but it's sure to be crafty!
OK, another thing though. Let's see a show of hands for everyone who calls it Modge Podge.
What did I make, you ask? Something for the sewing studio, and fabric was involved. Initially discovered on the interwebs by my real life friend, Elizabeth, decoupage light switch covers seemed like a wonderful idea, and once I saw the tutorial on the Jones Design Company website, I was so in!
She (Emily) suggests scrapbook paper, book pages, wrapping paper, or even... fabric! I was in luck because, well, I have a ton of fabric scraps, and a dislike for the boring plastic light switch covers. So, here we go...
 In the tutorial, she paints on the Mod Podge and then cuts the corners. That's a lot of stickiness, so I did the cutting pre-podge. By the way, the whole thing is about 1/2" bigger than the switchplate.
 Here you go... all the tools, plus added stuff from my table. Podge painted on plate and fabric.
 Fabric on, necessary parts cut out. Check out the original tutorial for more specific steps. Then more podge painted over the fabric to seal the whole thing.

 Not a perfect match with the wall, but way better than the old, well...not white... beige?... plastic switch plate. And hey! Fabric covers for the switchplates in the sewing studio (which you still haven't really seen... my apologies).
I'm sold! It took more time to choose the fabric than to actually do the podging (is that a word?). Well, not counting the drying time, but obviously I could move on to other projects while that was happening.
Go ahead... make something fun that you pinned, and show everyone!
Let's back up though. Are you on Pinterest? Do you pin and pin, or repin and repin, never to look at your boards again? Do you say, "oooh, how cool" or "I'm going to make that tomorrow" and then never do? Well, I've got a DIY board, and I'm going to attempt to actually make some of the things that I pin. Are you ready for this? It may or may not be sewing, but it's sure to be crafty!
OK, another thing though. Let's see a show of hands for everyone who calls it Modge Podge.
What did I make, you ask? Something for the sewing studio, and fabric was involved. Initially discovered on the interwebs by my real life friend, Elizabeth, decoupage light switch covers seemed like a wonderful idea, and once I saw the tutorial on the Jones Design Company website, I was so in!
She (Emily) suggests scrapbook paper, book pages, wrapping paper, or even... fabric! I was in luck because, well, I have a ton of fabric scraps, and a dislike for the boring plastic light switch covers. So, here we go...


I'm sold! It took more time to choose the fabric than to actually do the podging (is that a word?). Well, not counting the drying time, but obviously I could move on to other projects while that was happening.
Go ahead... make something fun that you pinned, and show everyone!
Subscribe to:
Posts (Atom)
LinkWithin
